QuickGL Online — How to Use (Complete Guide)
Step-by-step guide to QuickGL Online accounting and inventory software: set up your company, add products and customers, make your first sale and purchase invoice, run the POS counter, and read every report. With real screenshots.
Everything below uses real screens from a demo company. Follow it in order the first time — after that, jump to whatever you need.
What QuickGL Online is
QuickGL Online is accounting and stock software you use in a web browser. It keeps a proper double-entry ledger, tracks stock across locations, and prints the invoices and vouchers a business actually hands to people. There is nothing to install — you sign in, and the same data is there on a laptop, a tablet or a phone.
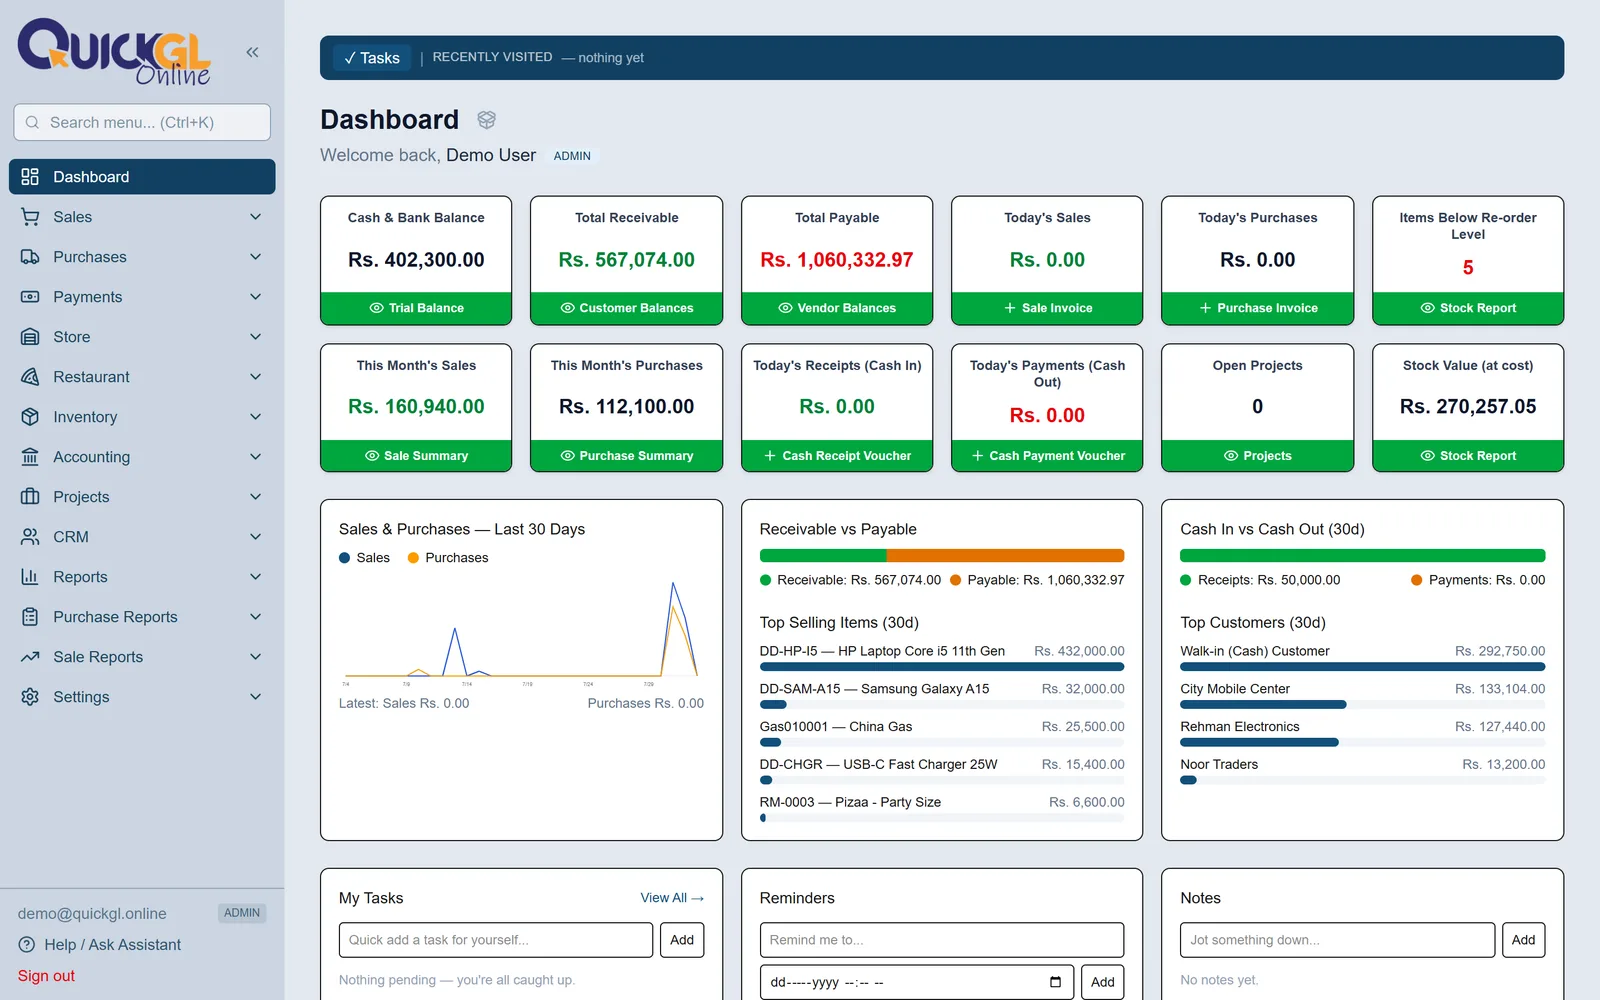
The Dashboard is the first screen after signing in: today's sales, what customers owe you, what you owe suppliers, and the last 30 days as a chart.
Setting up, step by step
Do these ten things once, in this order. Each one builds on the last, and skipping ahead is the usual reason figures come out wrong later.
1Sign in
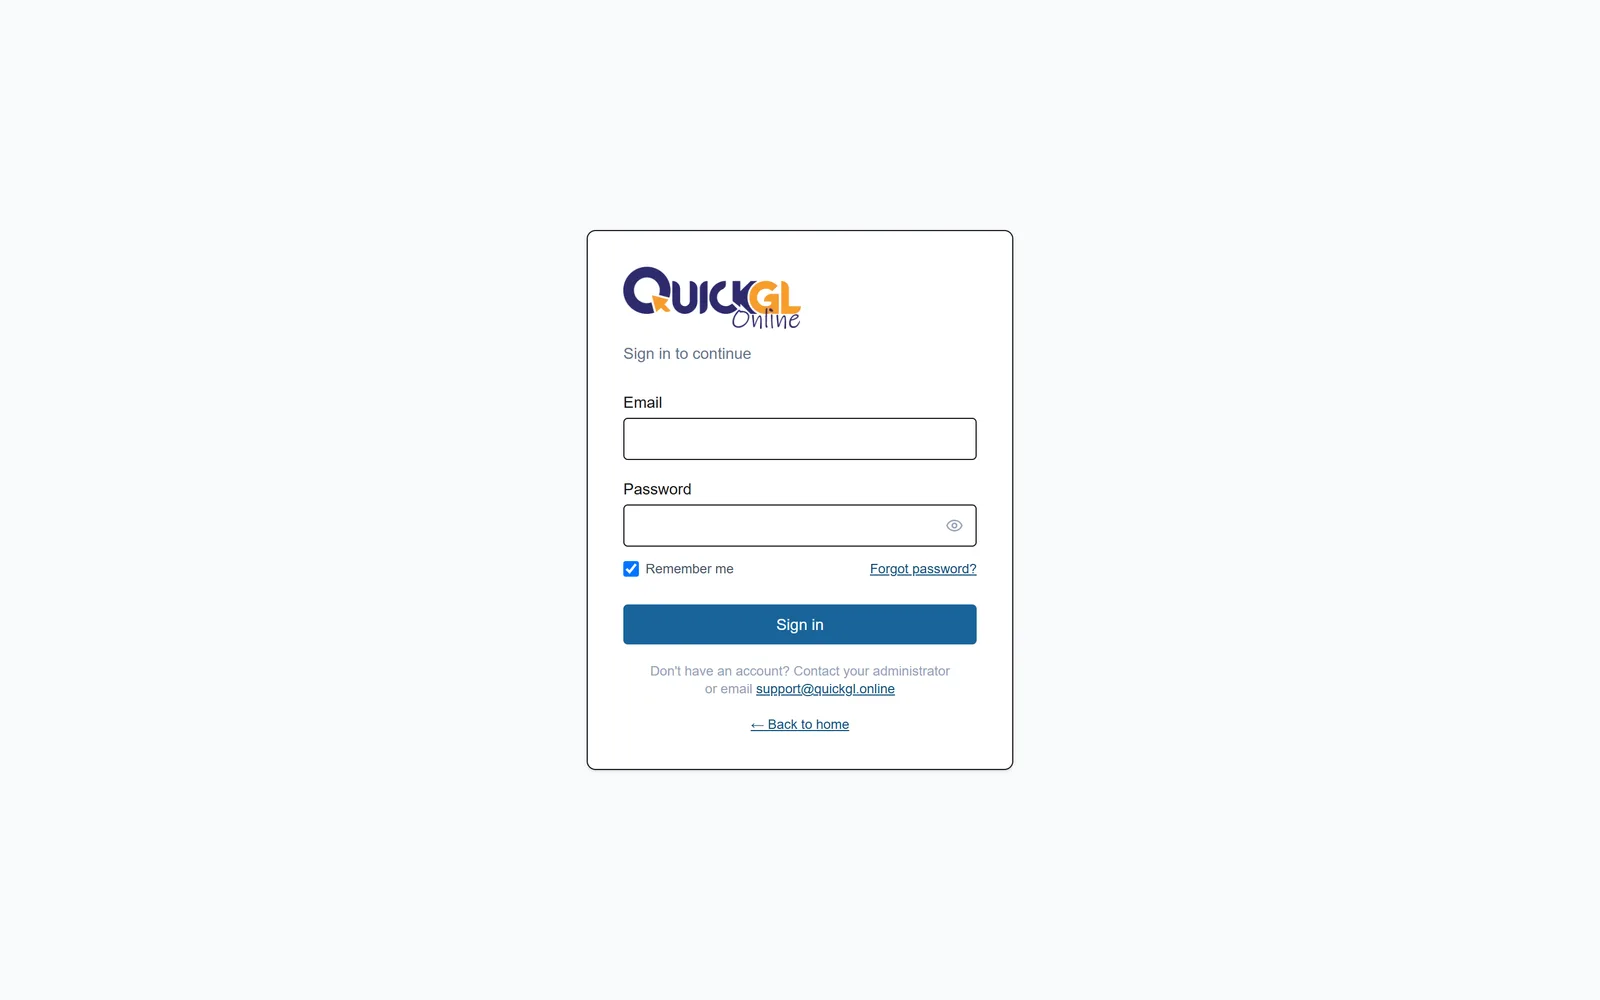
Open your company's web address and sign in with the email and password your administrator gave you. There is no public sign-up — only an admin can create logins. Tick "Remember me" only on your own device.
2Company Setup
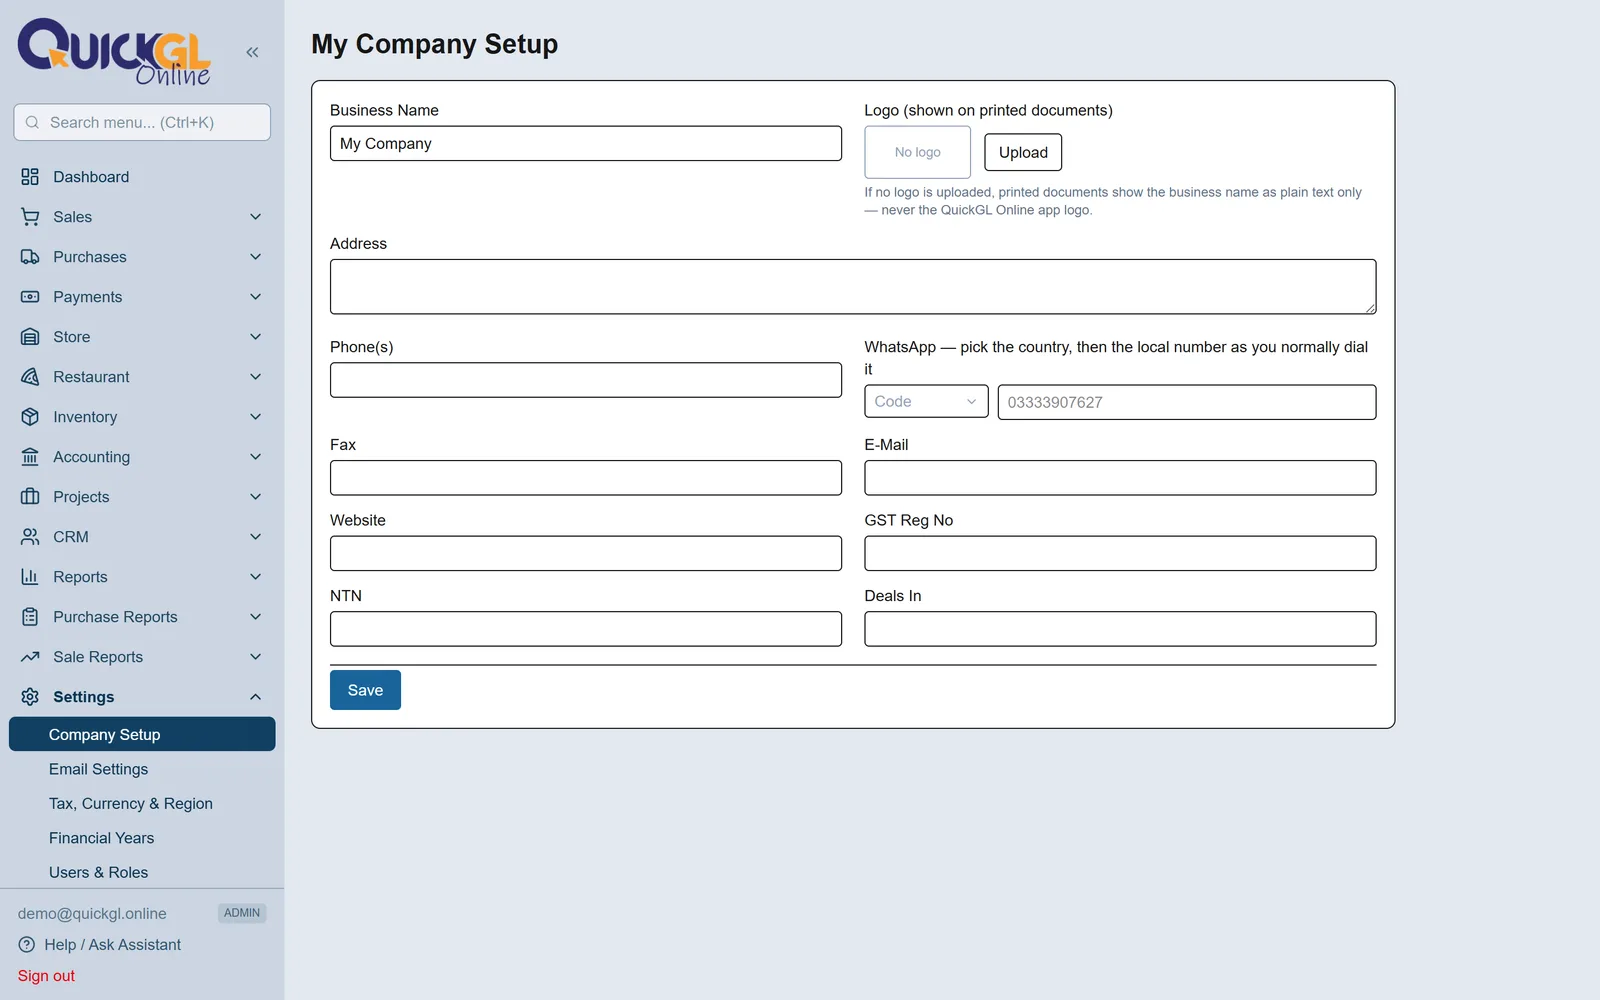
Settings → Company Setup. Enter the business name, address, phone and tax registration numbers, and upload your logo. This block is what prints at the top of every invoice, so get it right once and it is right everywhere.
3Check the Chart of Accounts
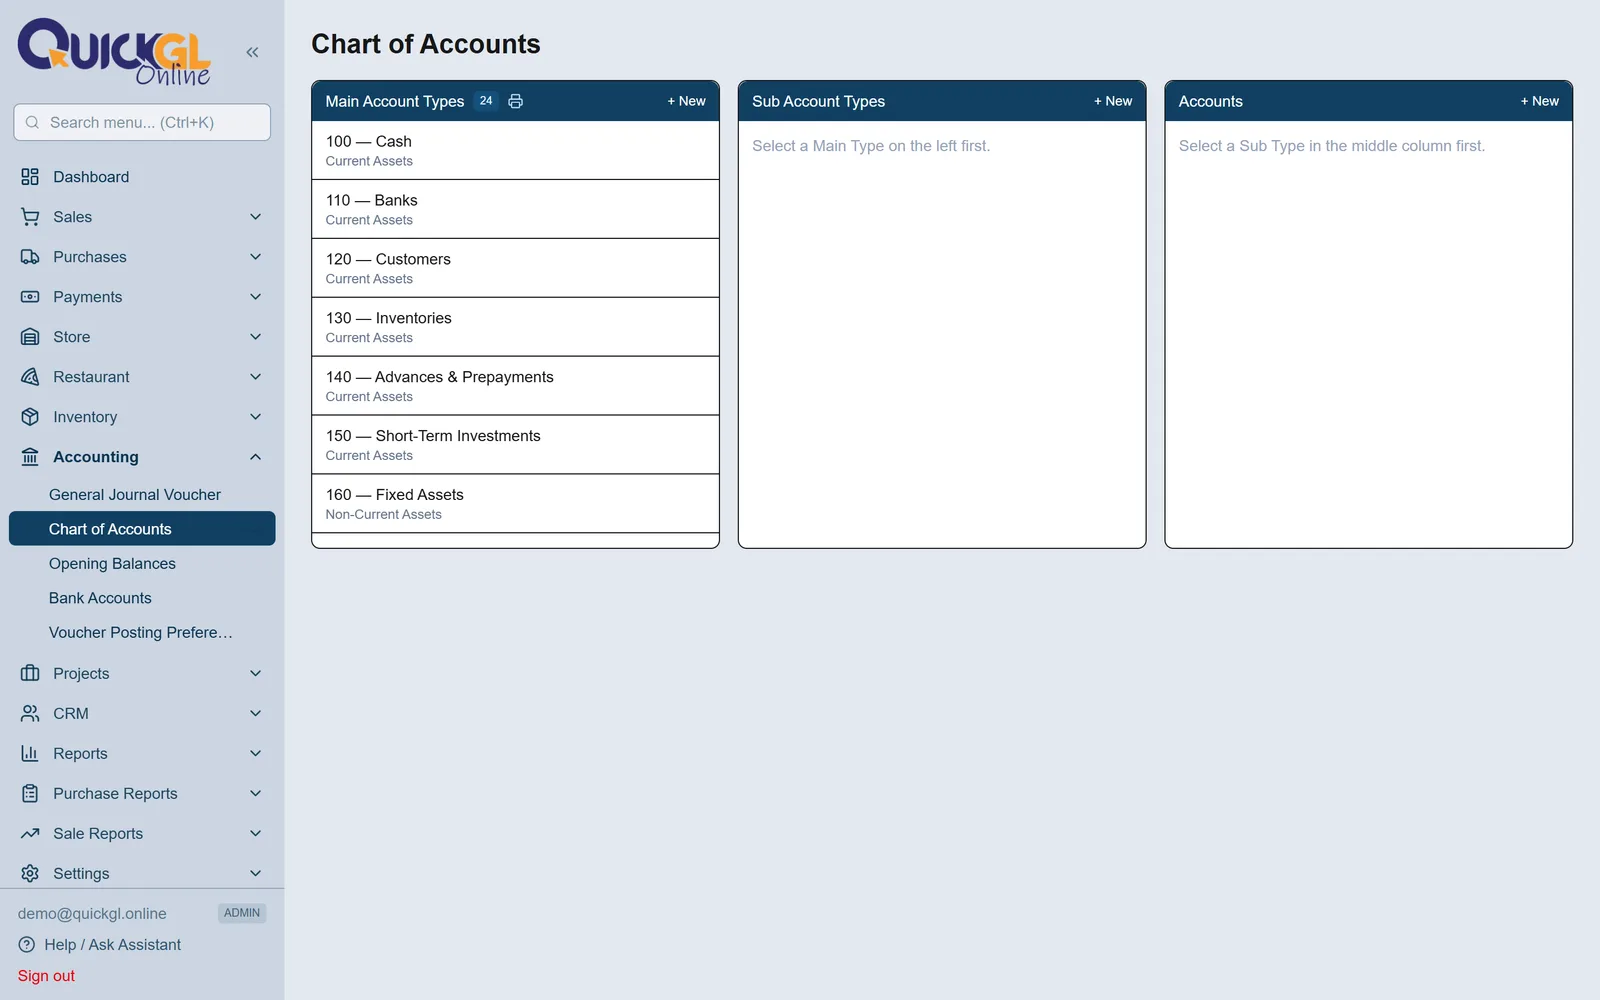
Accounting → Chart of Accounts. Every account a normal business needs is already there. Just look through it and add anything specific to you. One rule matters: a named customer or supplier belongs under Credit Customers / Credit Vendors, never under the Cash types — a party placed in a Cash type gets no ledger and no statement of their own.
4Add your customers
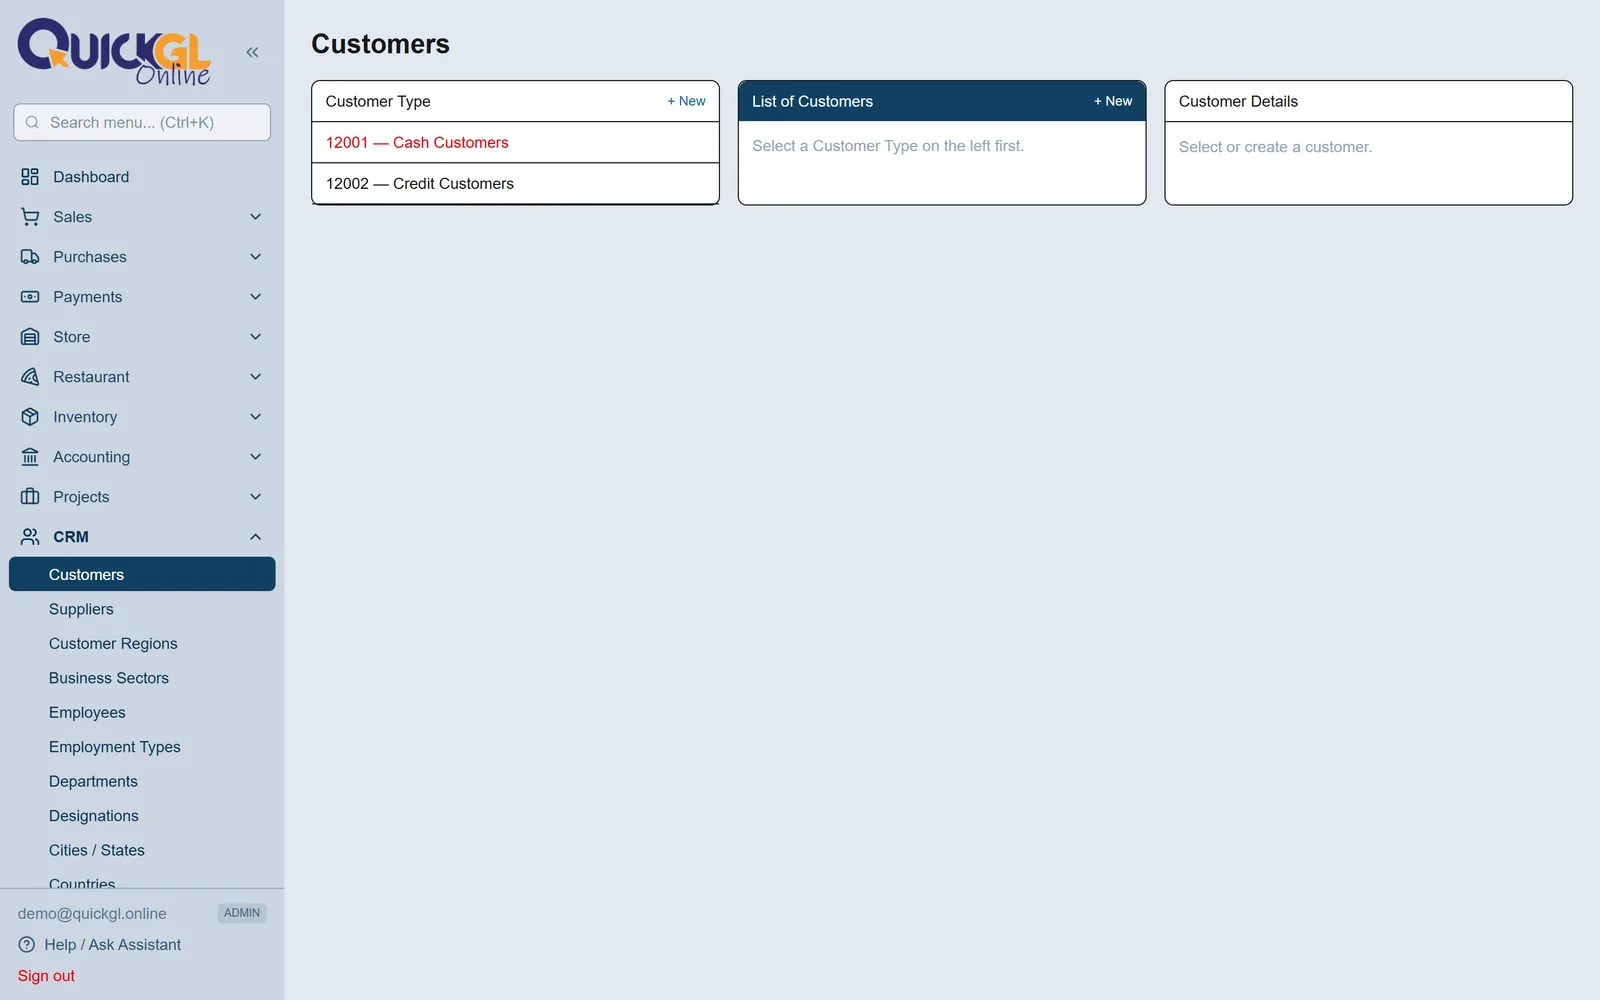
Parties → Customers. Add each customer with their phone, WhatsApp and region. Use this page rather than Chart of Accounts: only here can you record Region, Sub-Region, Business Sector and Account Manager, and every customer report filters on those four.
5Add your suppliers
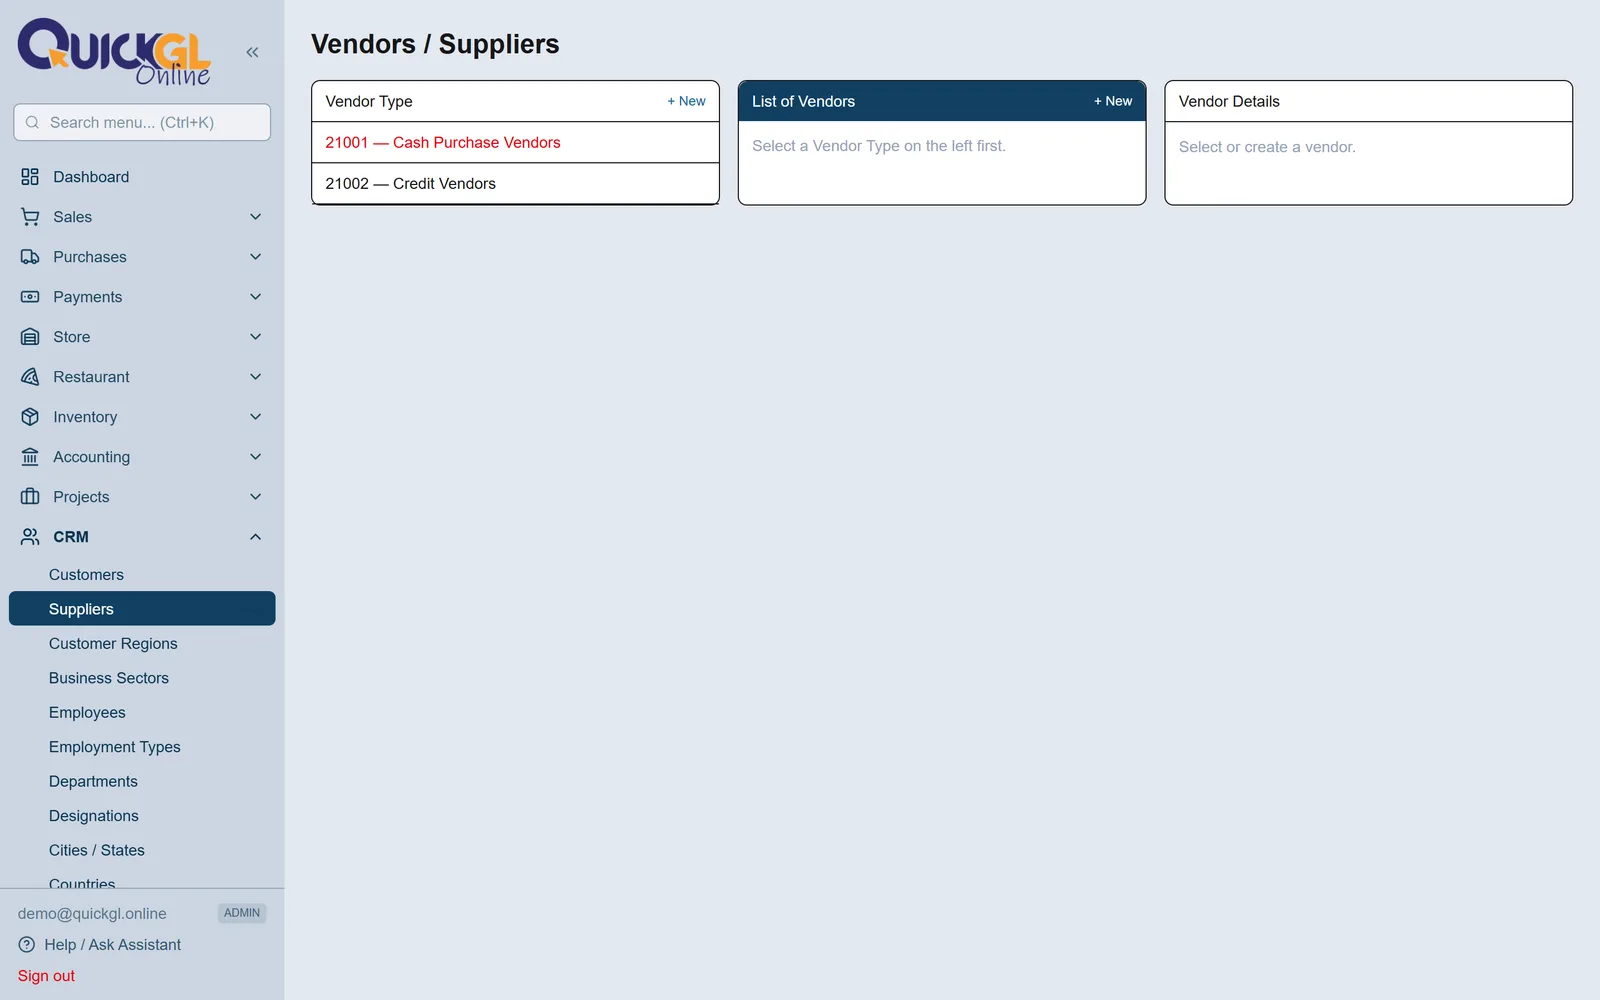
Parties → Suppliers. The same idea as customers, for the people you buy from. Each one gets its own ledger, so you always know what is owed to whom.
6Add your products
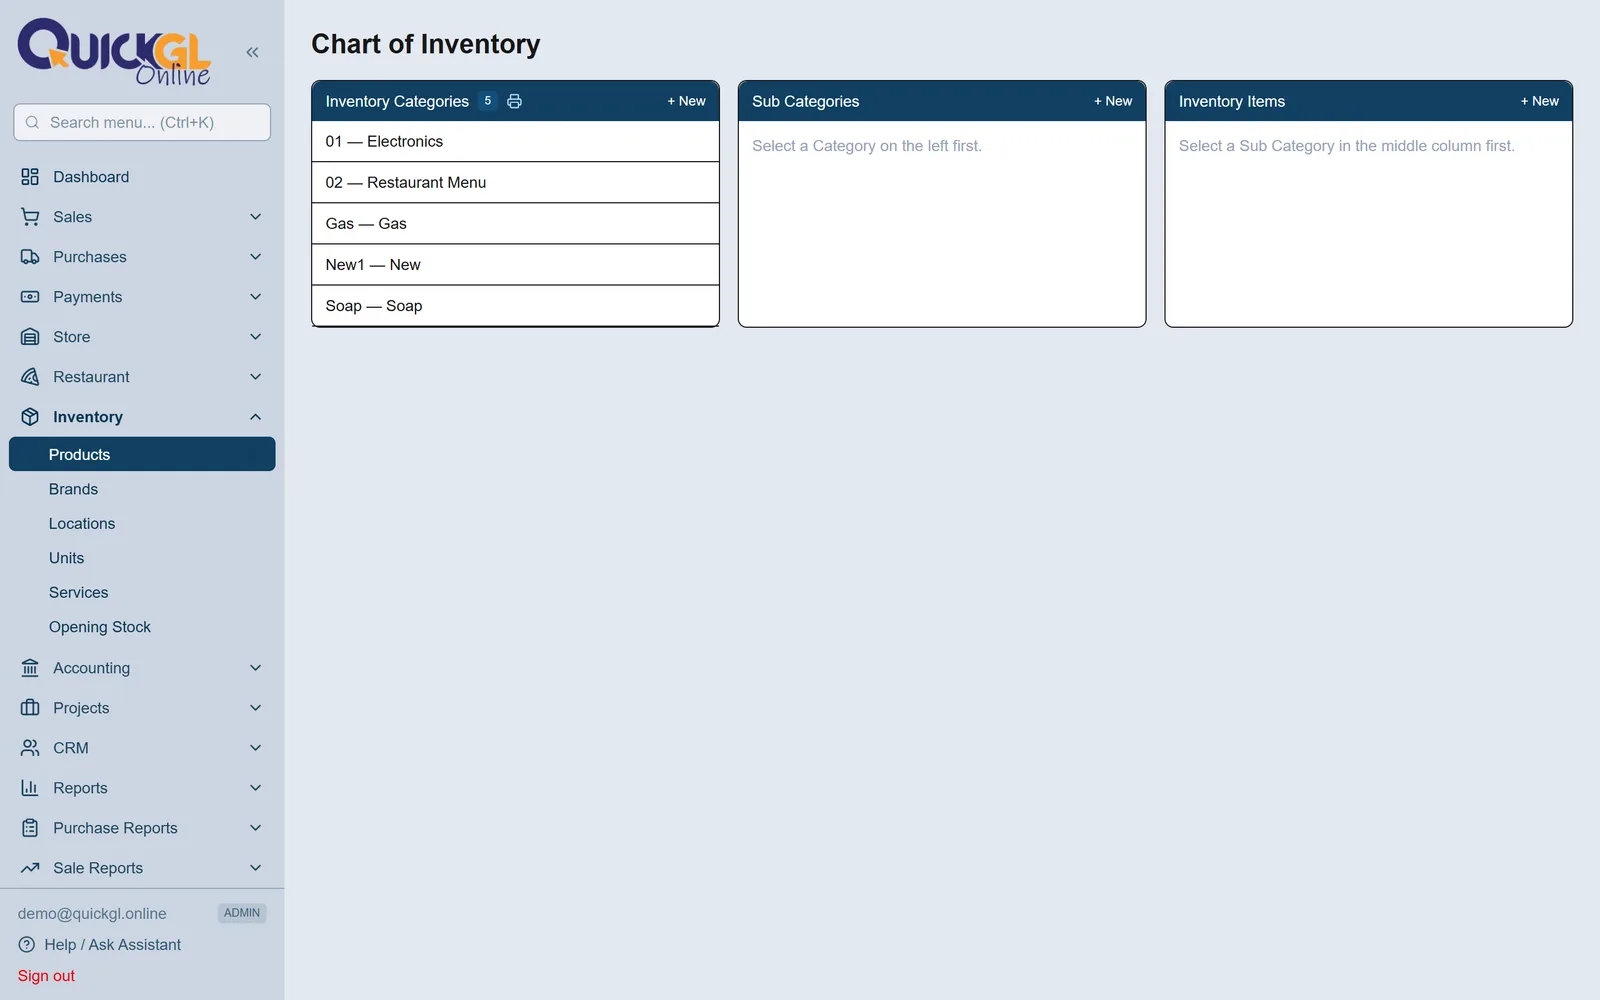
Inventory → Products. The left column is your categories, the middle is sub-categories (which can go as deep as you like), and the right is the items themselves. Give each item its unit, purchase price and selling price. Items you never stock — labour, delivery, repairs — go under Services instead.
7Units and locations
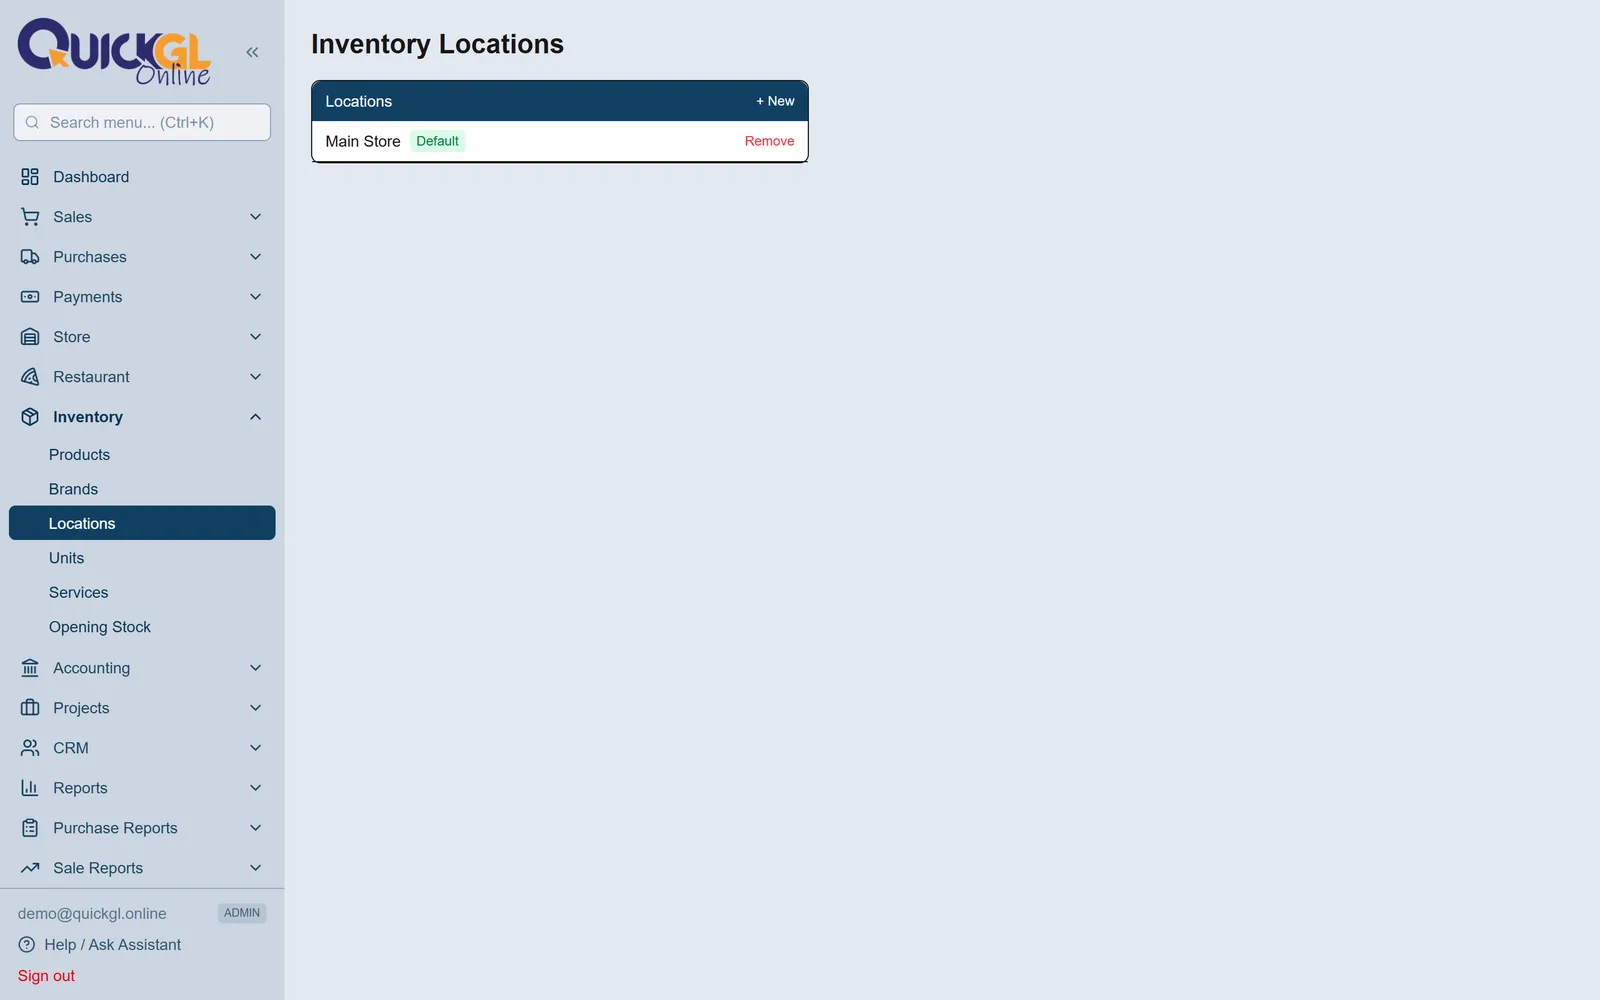
Inventory → Units and Inventory → Locations. Units are Piece, Kg, Carton and so on. Locations are your shops or godowns; mark the main one as Default so every form opens on it. If you only have one shop, leave it as it is.
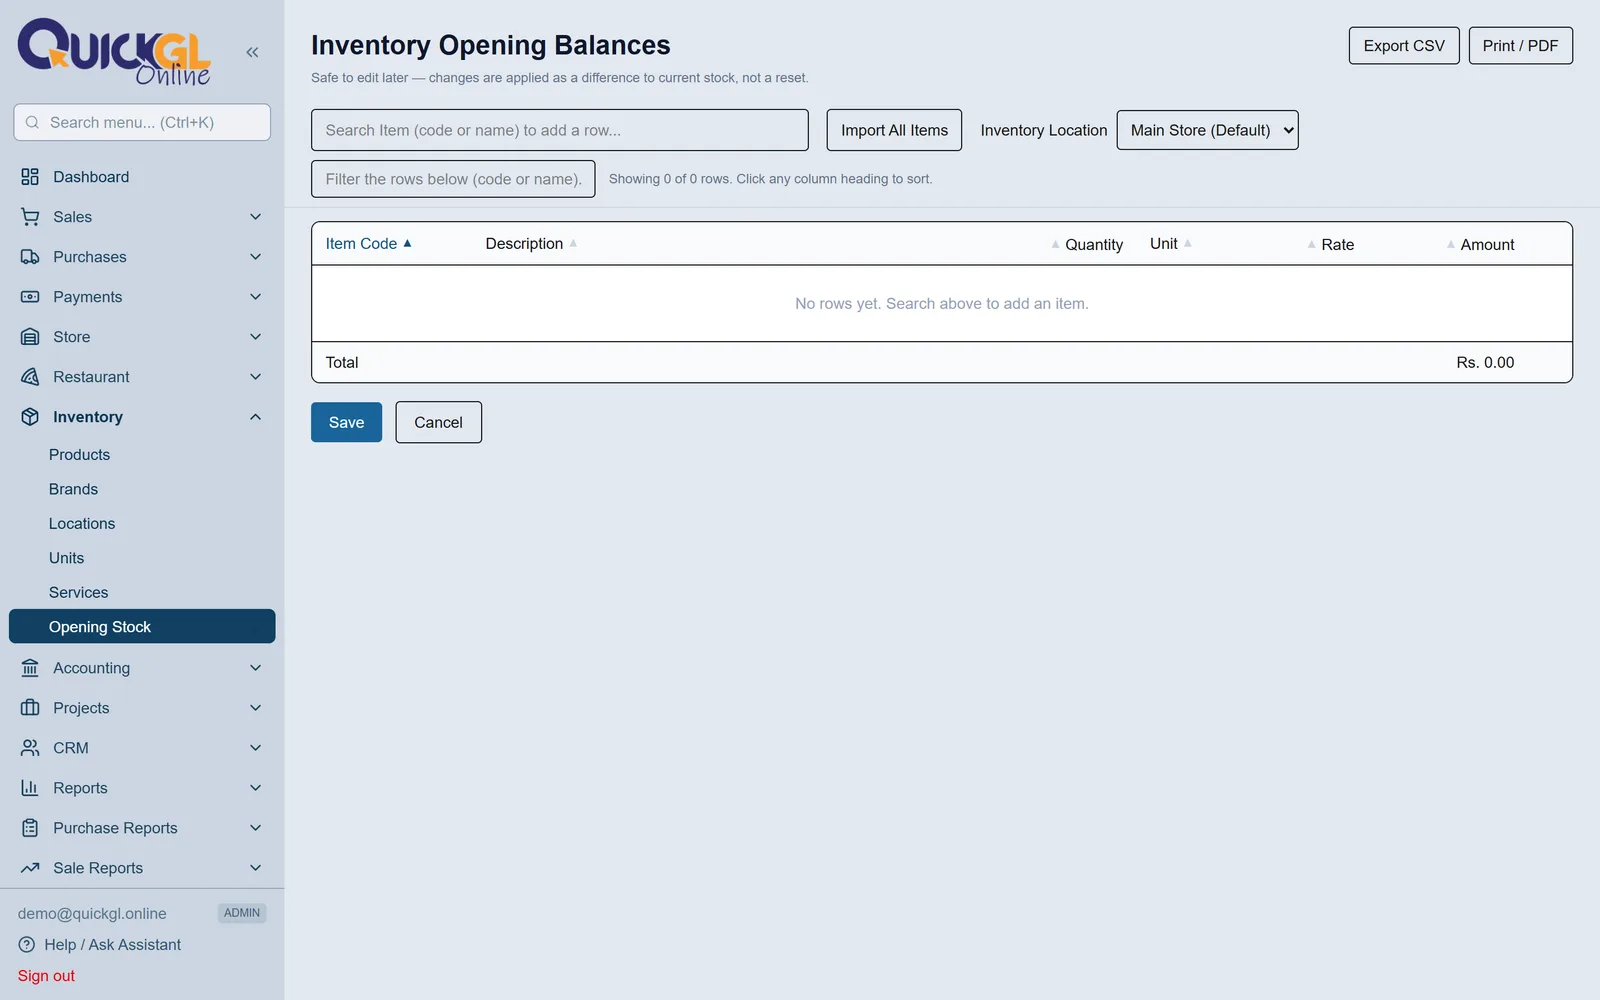
8Enter your opening stock
Inventory → Opening Stock. For every item you already have on the shelf, enter the quantity and what it cost you. Two things to avoid: a negative quantity, and a rate of zero — a zero rate makes the item look free, so its first sale shows as pure profit.
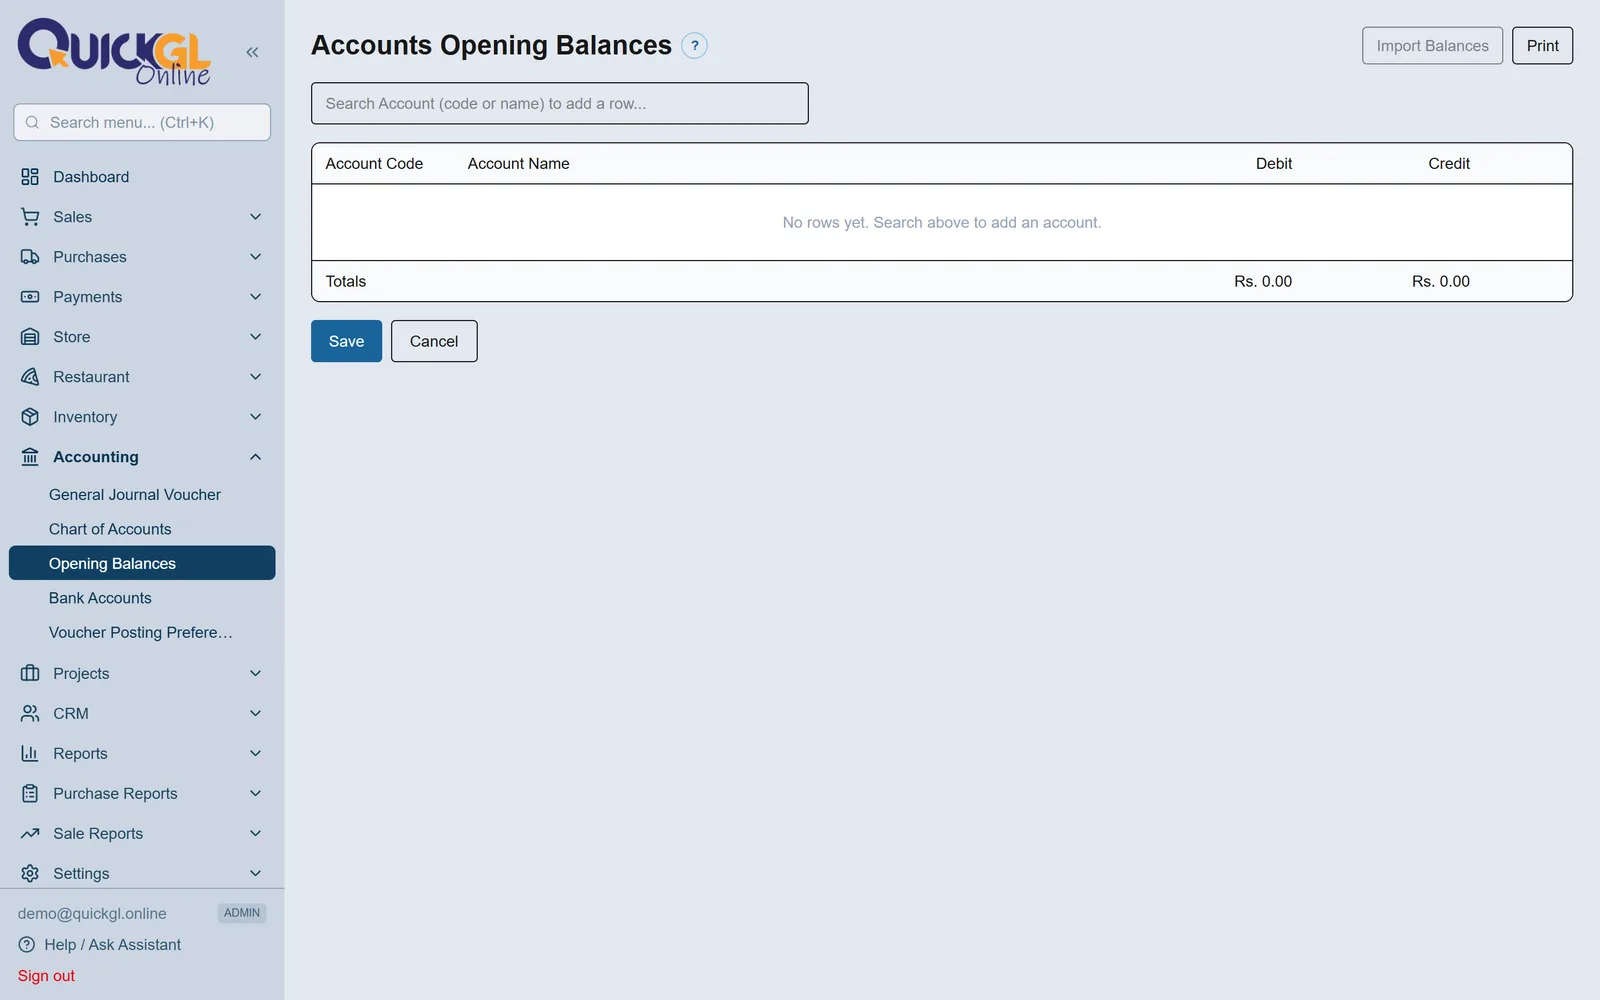
9Enter your opening balances
Accounting → Opening Balances. Enter what is in your cash and bank accounts, what each customer owes you, and what you owe each supplier — plus the total stock value from the last step. Then adjust the Accumulated Profit & Loss account until the whole sheet nets to zero. If it does not balance, nothing after it will.
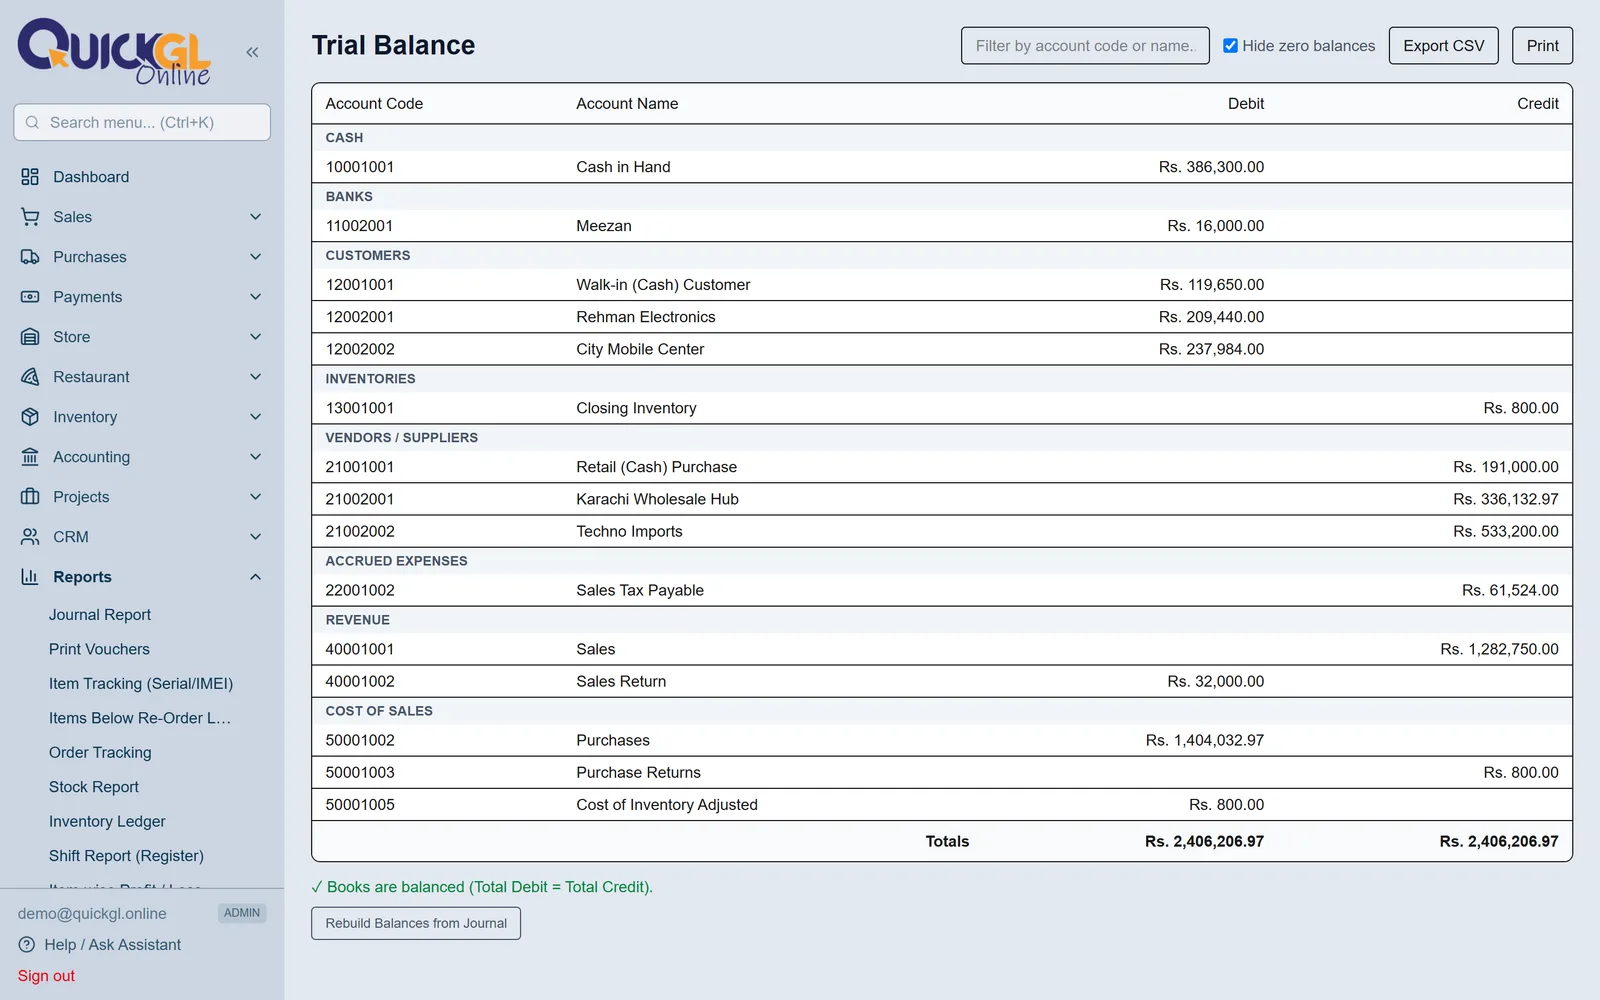
10Check it balances
Reports → Trial Balance. Debits and credits must be equal. If it says "Out of balance", go back to Opening Balances and fix it before posting anything real. Once it balances, you are ready.
Everyday work
Four screens cover almost every day: buying, selling, taking money in, and paying money out.
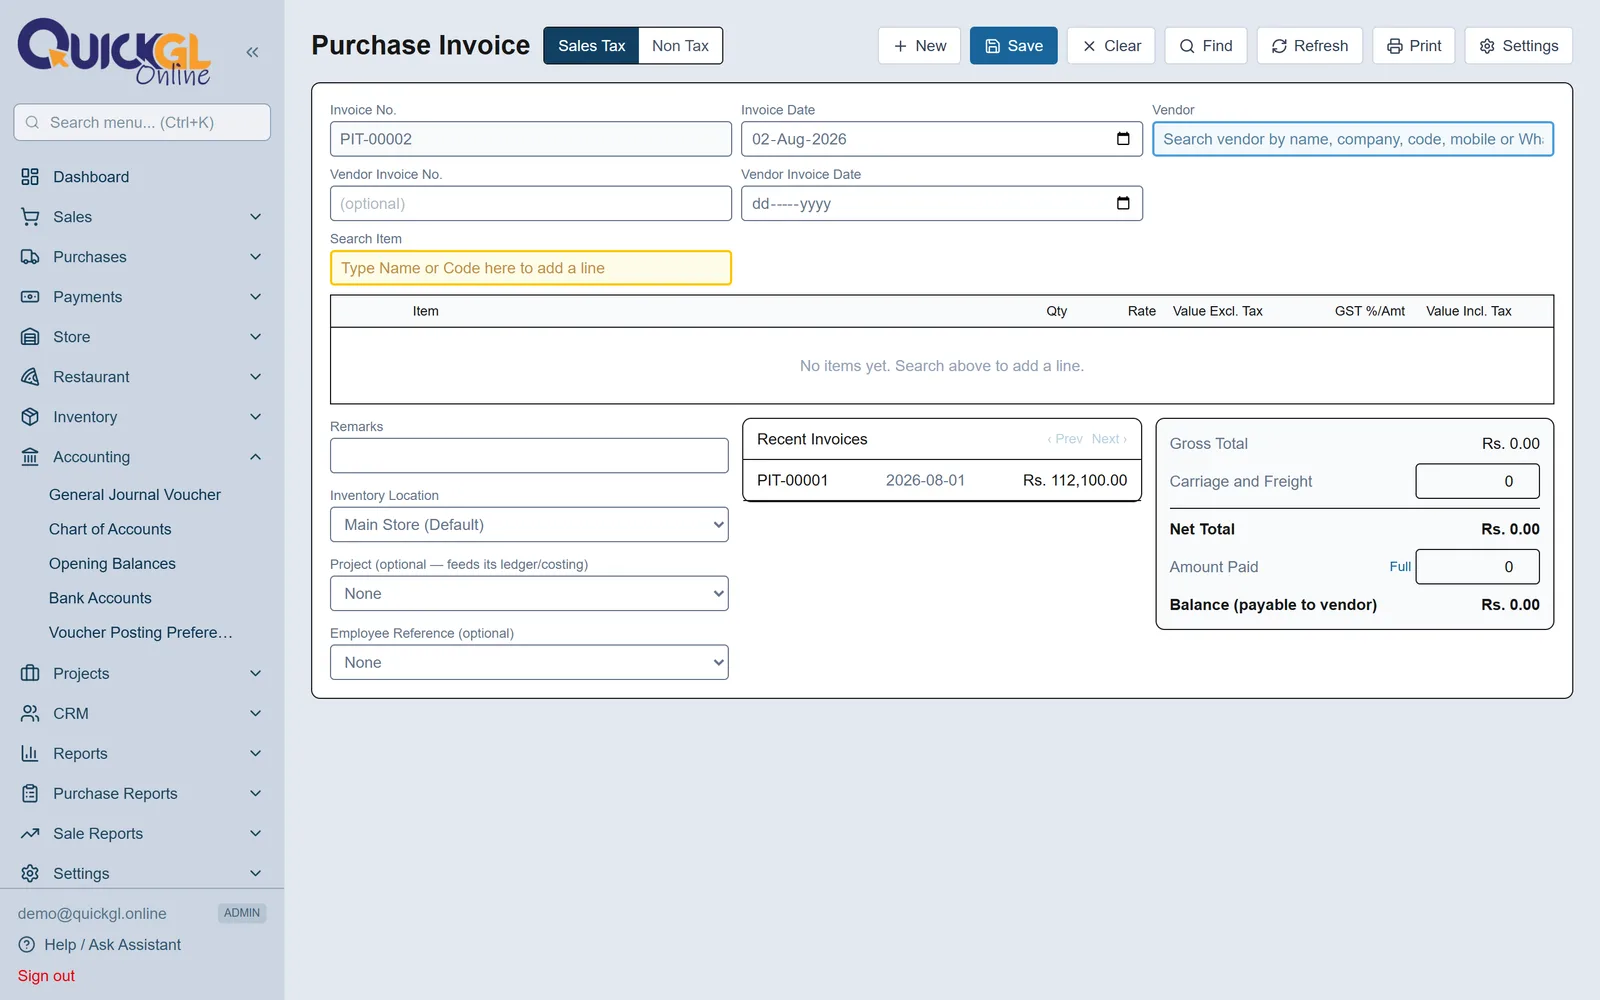
1Purchase Invoice — buying stock
Purchases → Purchase Invoice. Pick the supplier, search each item and enter quantity and rate. Stock goes up, the supplier's account is credited, and if you paid something now, enter it in Amount Paid. Use the Tax version when the supplier charged sales tax, the Non-Tax version when they did not.
2Sale Invoice — selling
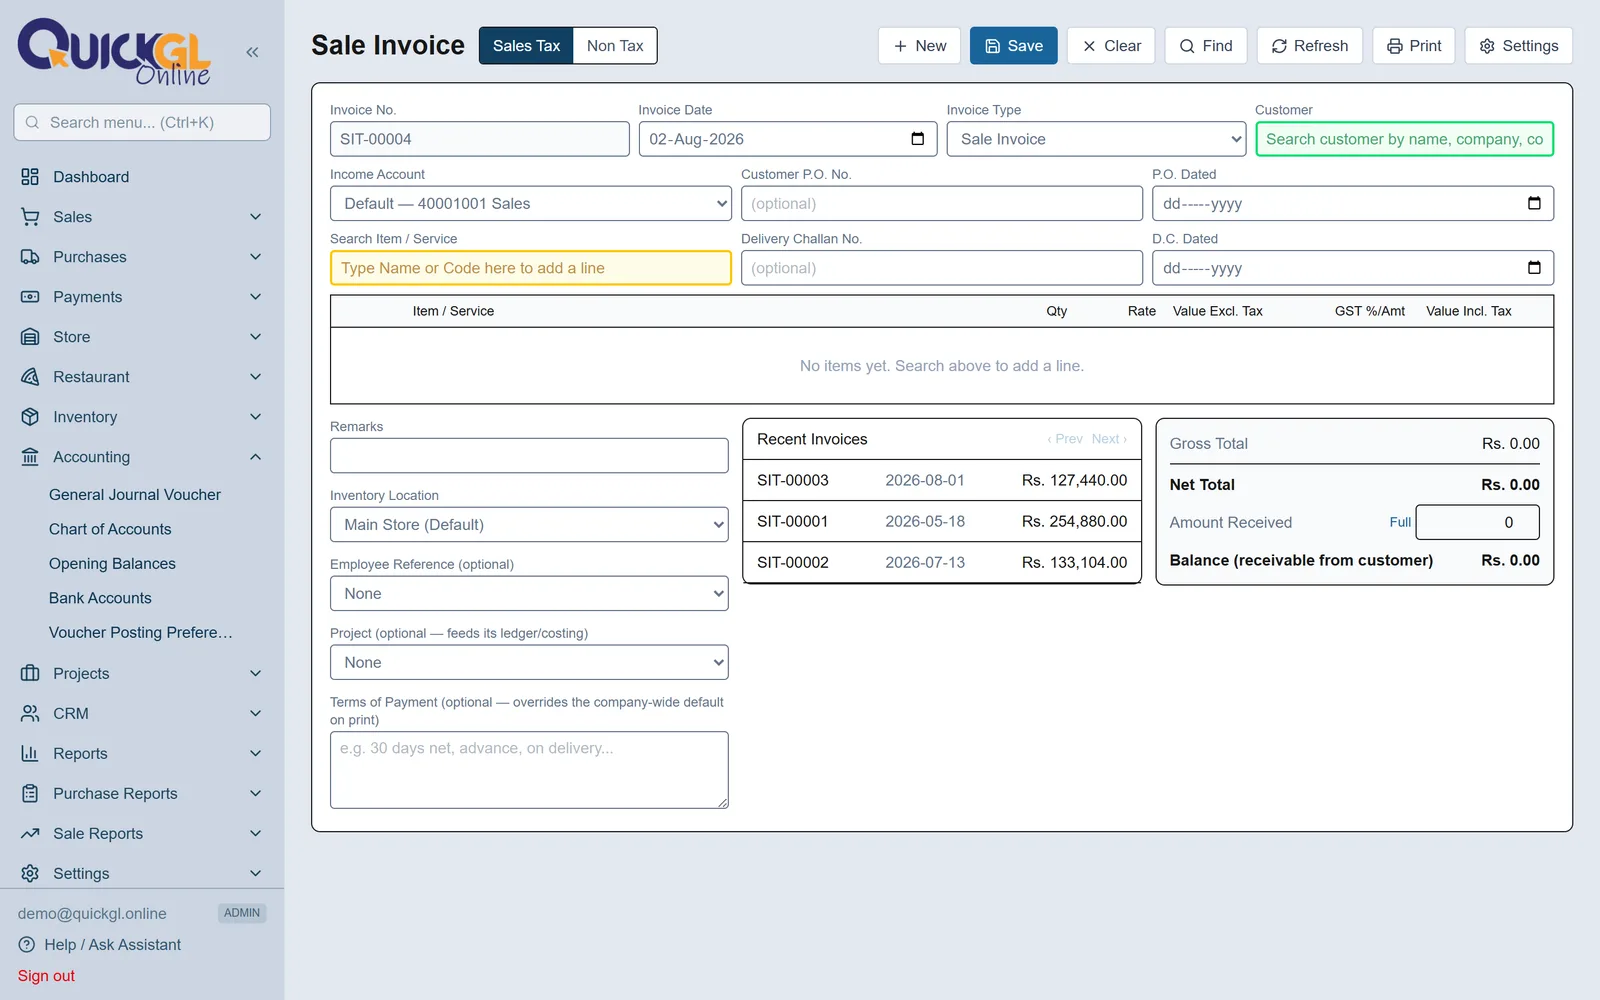
Sales → Sale Invoice. Pick the customer, add the items, and Save. Stock comes down, sales income is recorded, and the customer is debited for whatever they did not pay now. Invoice Type also lets you bill Services instead of stock items on the very same screen.
3Receiving money
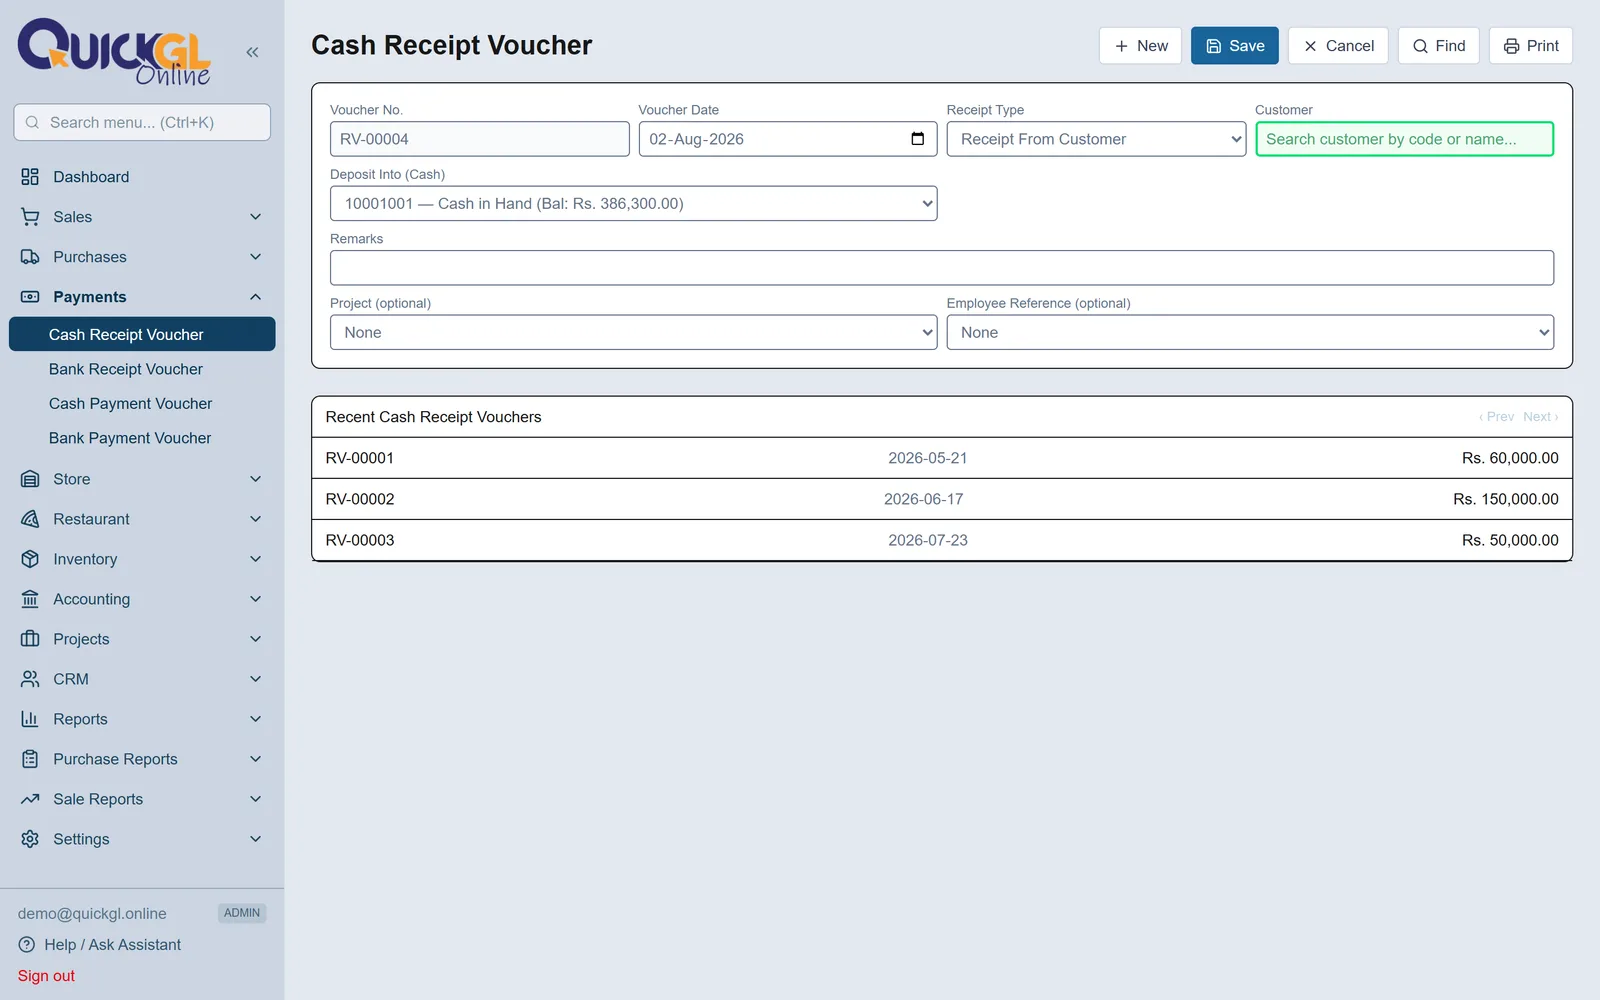
Payments → Cash Receipt (or Bank Receipt). Choose the customer, click Select Invoices, tick the bills this payment is settling, and enter the cash against each. Anything extra goes in the Prepayment row as an advance. The bank version also records the cheque number and date.
4Paying money out
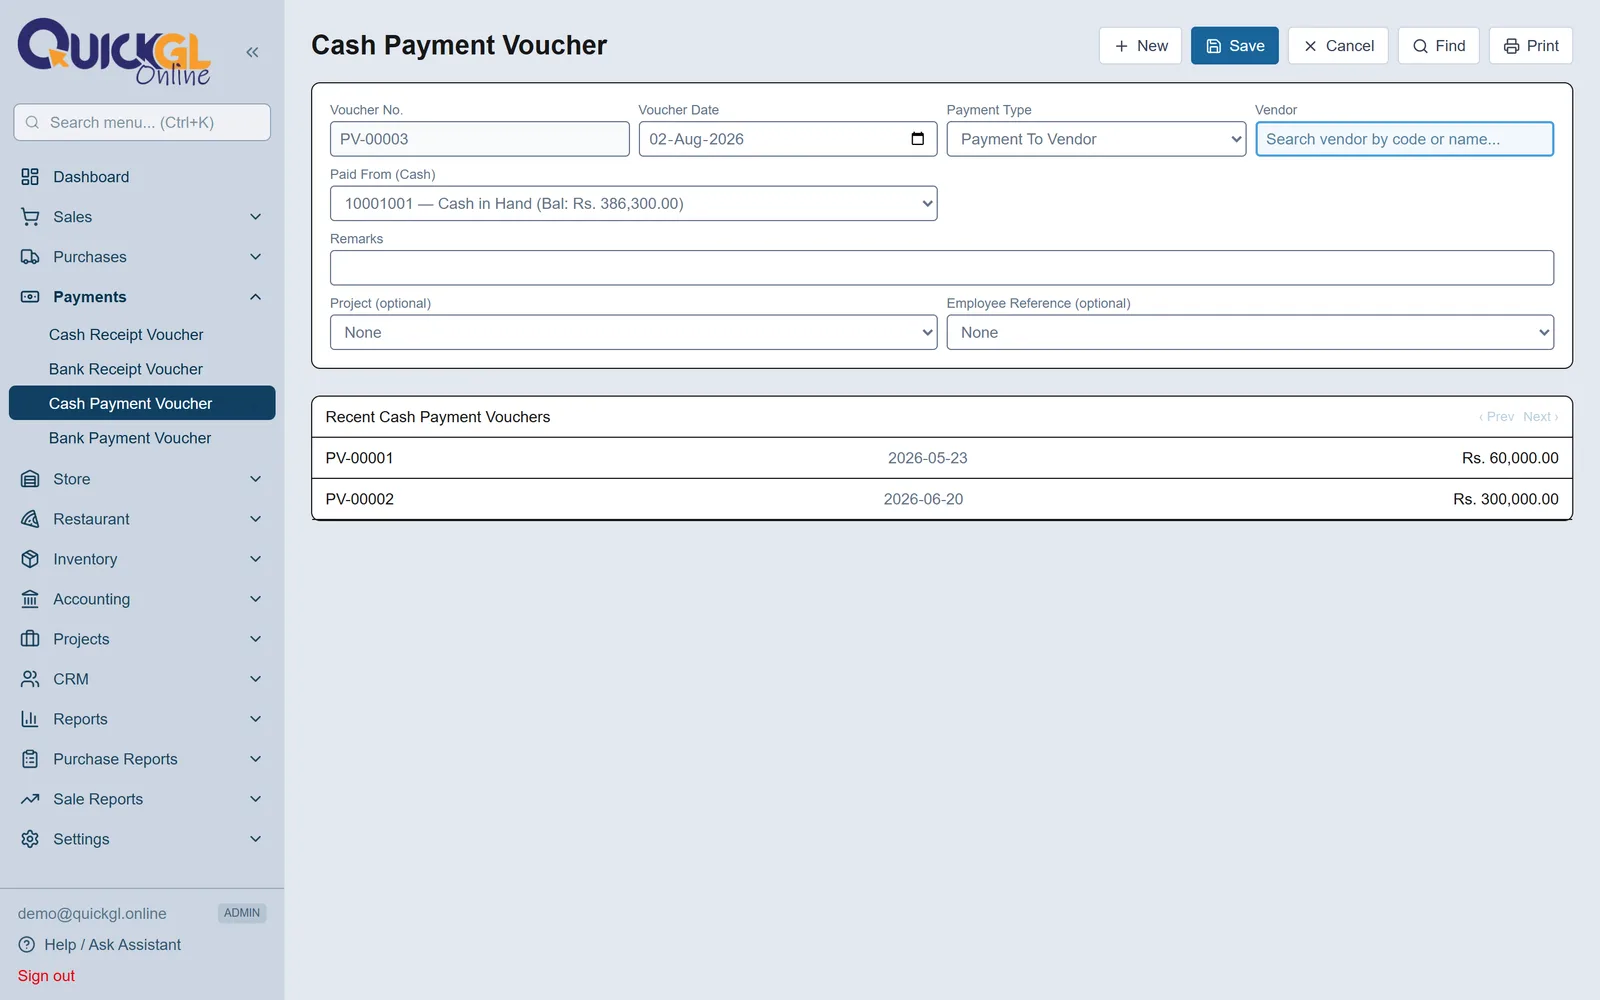
Payments → Cash Payment (or Bank Payment). Exactly the same screen, the other way round: pick the supplier and settle their bills. For expenses that belong to no supplier — rent, electricity, tea — use Petty Payment, which lets one voucher pay several accounts at once.
5Returns
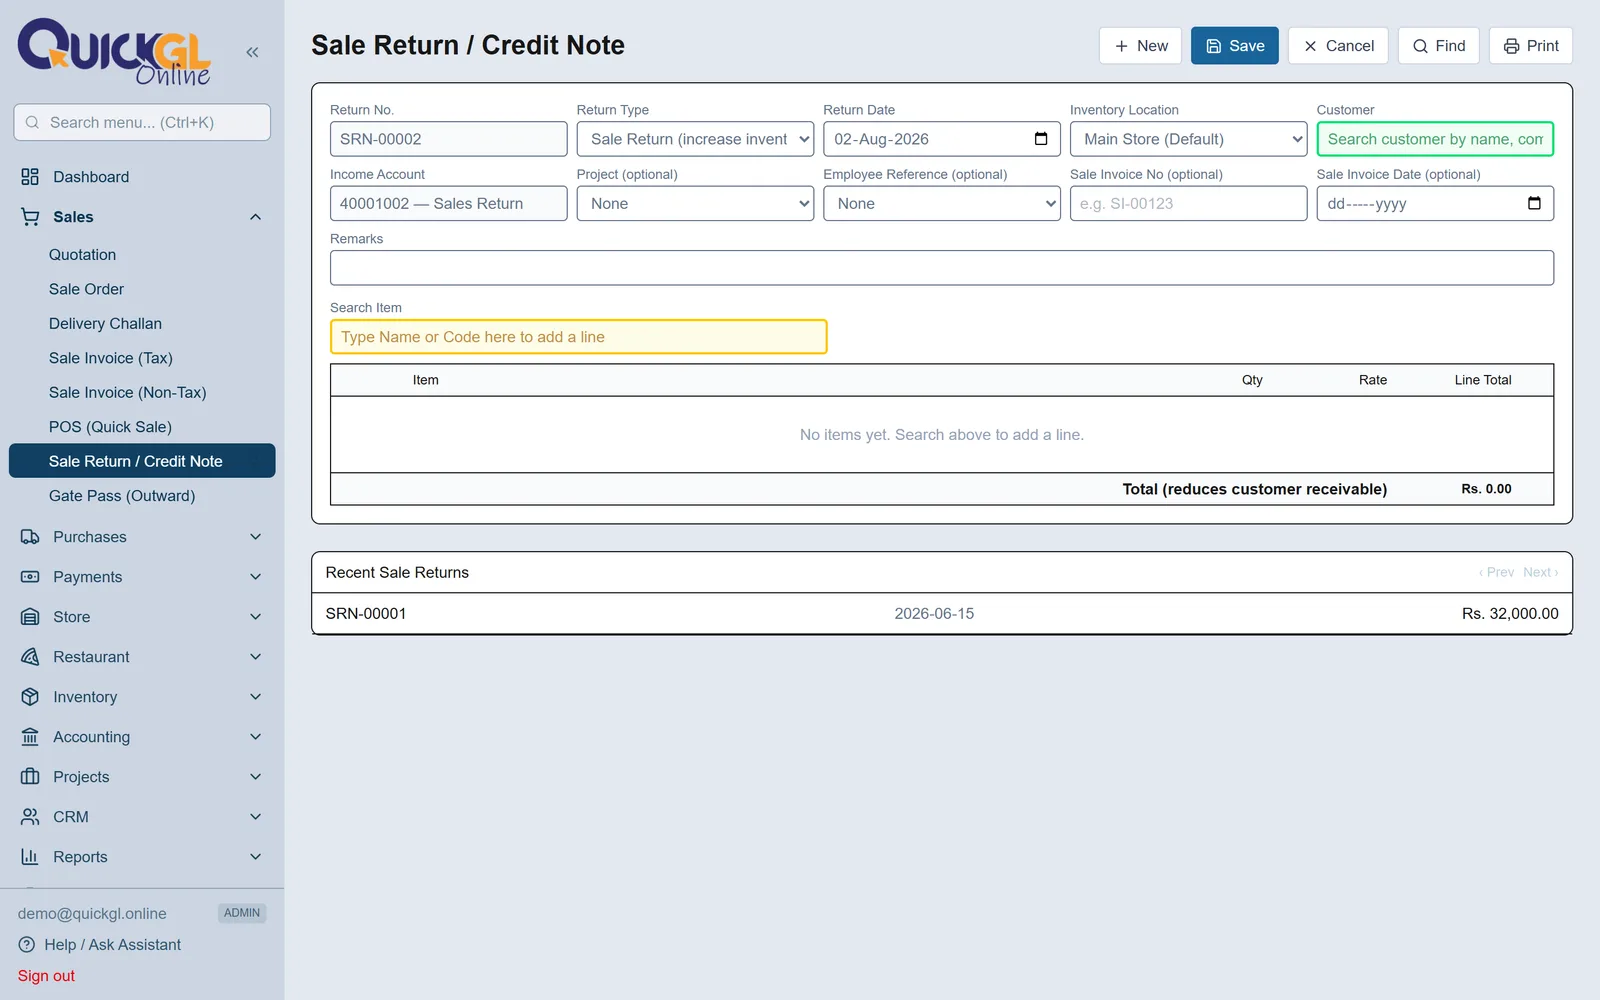
Sales → Sale Return when a customer brings goods back; Purchases → Purchase Return when you send goods back to a supplier. Sale Return also has a Rate Adjustment type: use it when only the price was wrong and no goods actually moved.
Running a sales counter (POS)
POS is the fast screen for a shop counter: scan or search, take the money, print the receipt. Everything it posts is an ordinary Sale Invoice, so nothing about your accounts works differently.
1Making a quick sale
Sales → POS (Quick Sale). The customer is already set to Walk-in, so just scan or type in the yellow box to add items, enter what you received, and press Complete Sale. Optionally record the buyer's mobile number and name for the receipt — next time you type that same number, the name fills itself in.
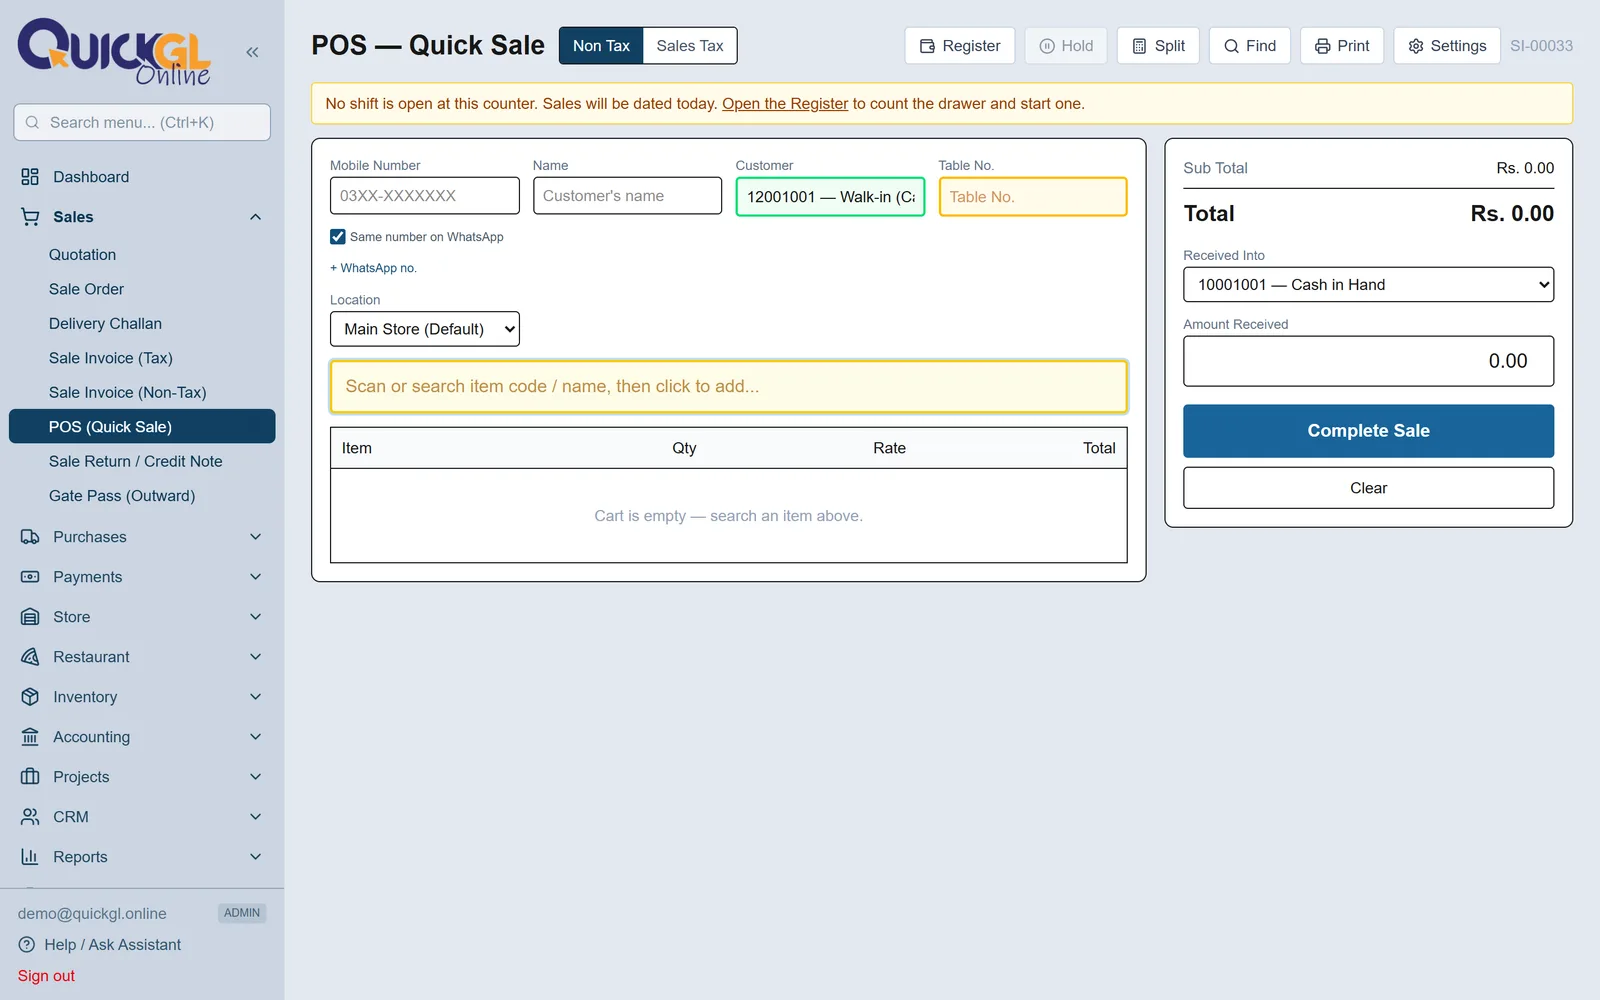
2Register — the cash drawer
Switch it on from ⚙ Settings. At the start of the day you count the drawer note by note and open the shift; at the end you count again and the screen tells you whether you are over or short. Hand Over closes your shift and opens the next person's with the cash you just counted, so each person answers only for their own hours.
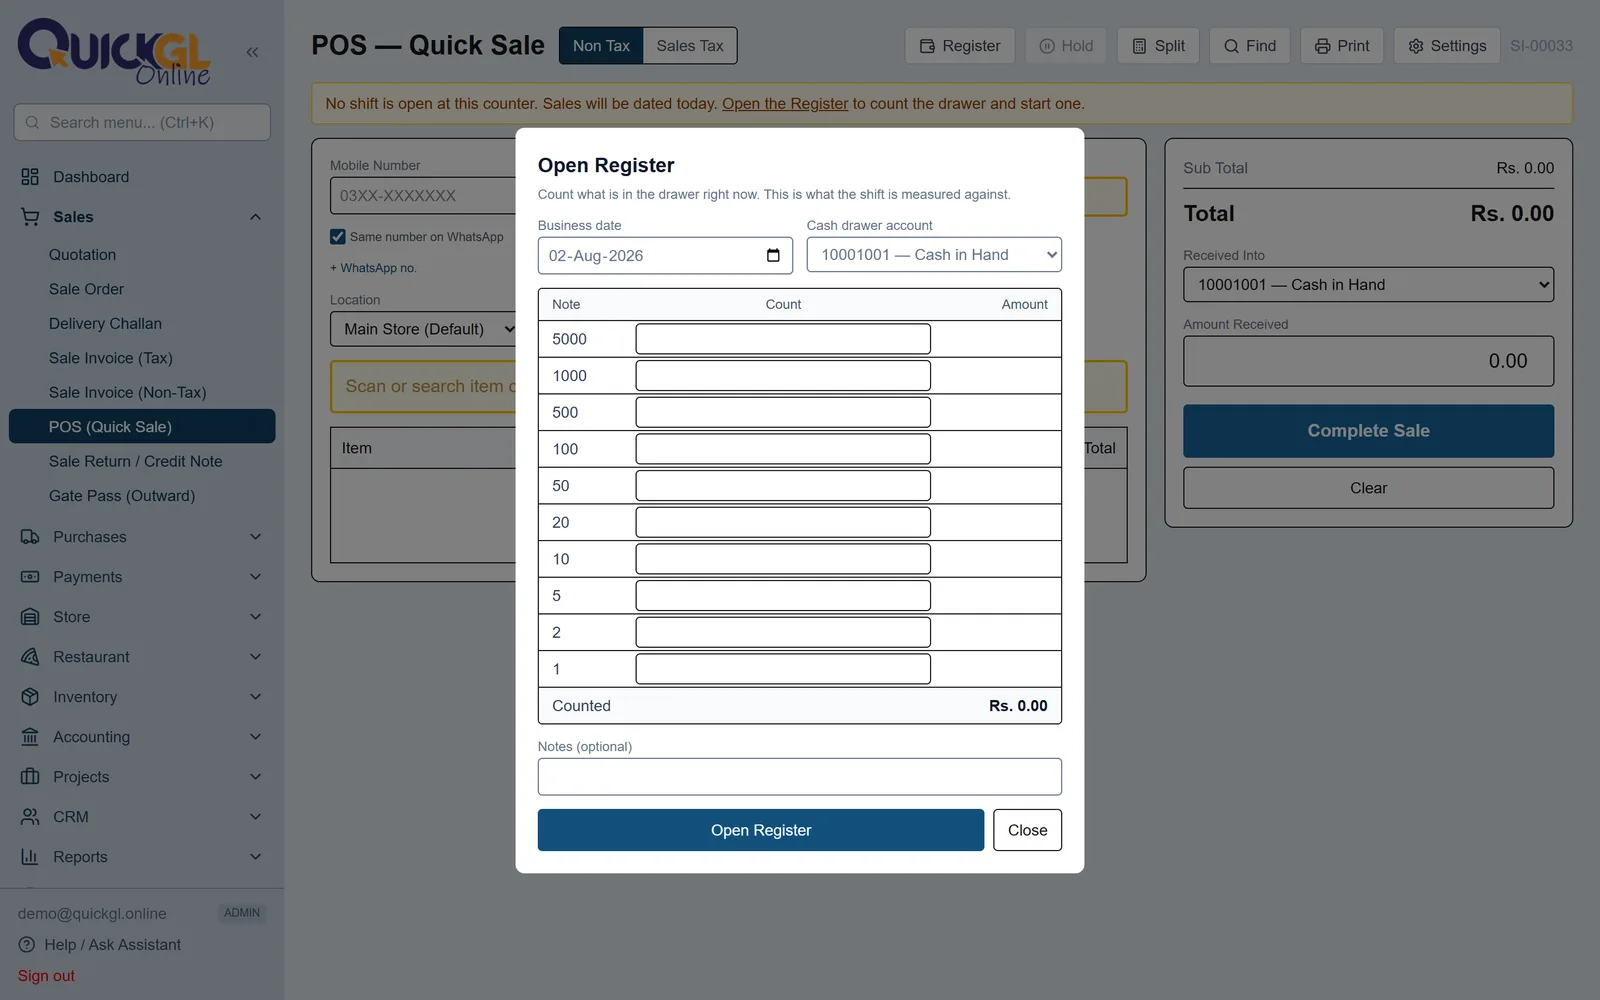
3Split — part cash, part card
When one bill is paid in more than one way, click Split and enter each part with the account it goes into. Card money settles into a bank account, not the till, so it must be picked from the bank list — that is what keeps the drawer count honest. Change is always given from the cash part.
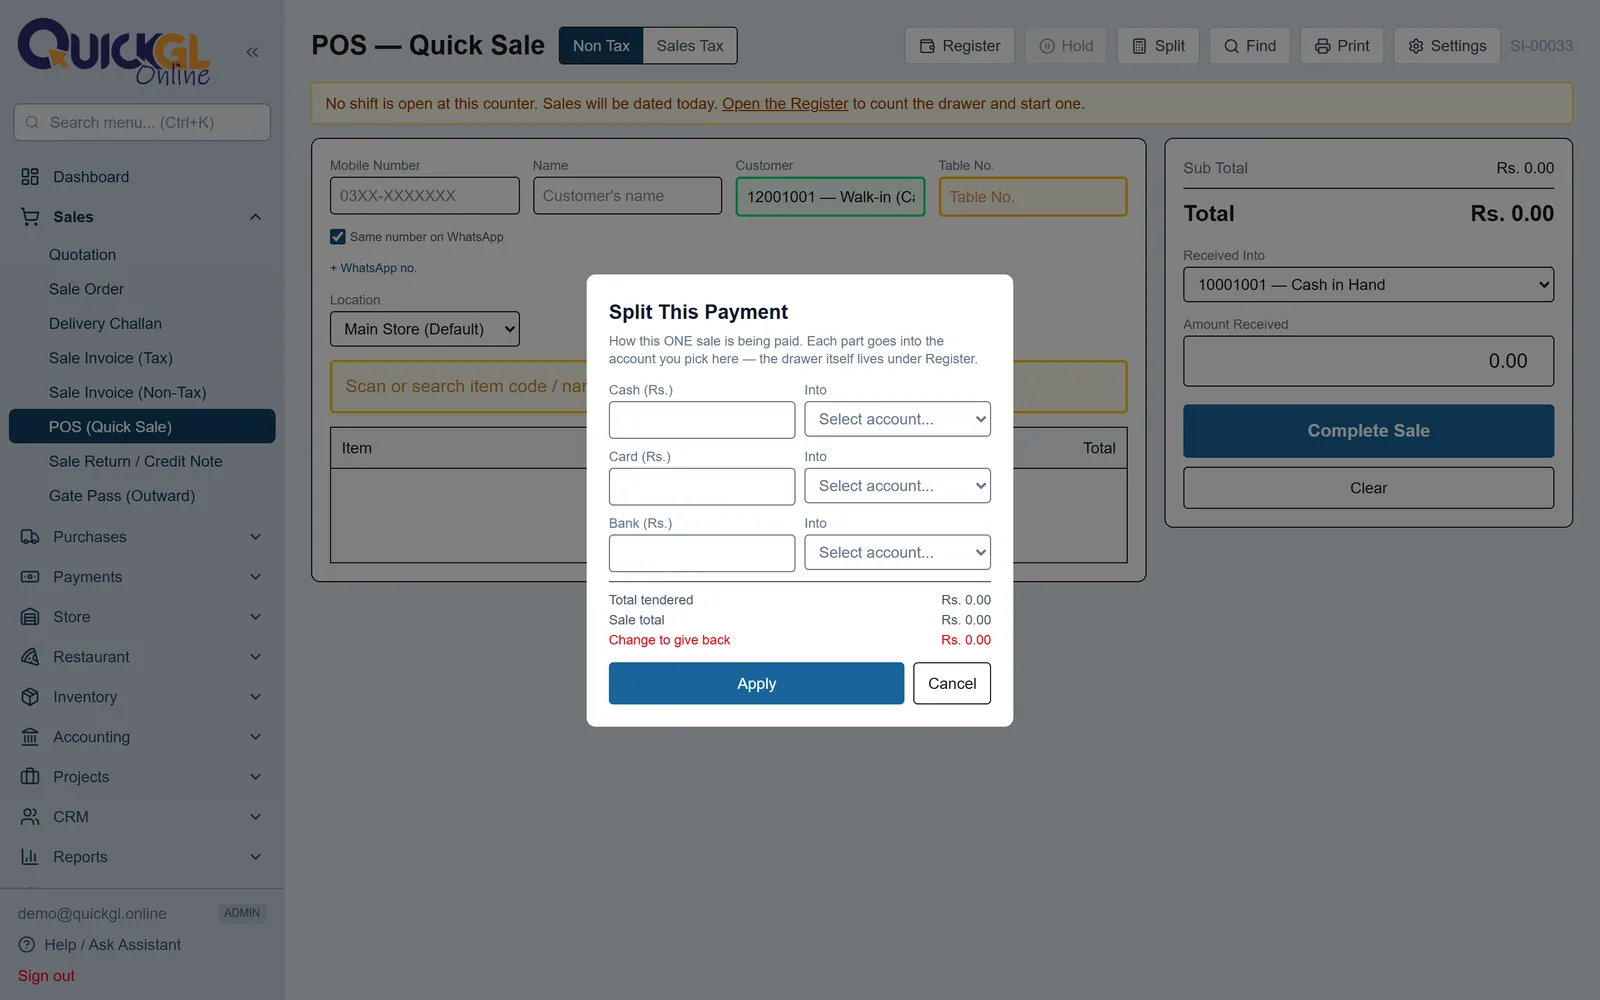
4Hold and table numbers
Hold parks an unfinished bill so you can serve the next customer; parked bills appear as chips along the top and come back with one tap. A held bill takes no invoice number and moves no stock until it is completed. From ⚙ Settings you can also switch on a Table or Token number and rename it to suit your business — it then prints on the bill too.
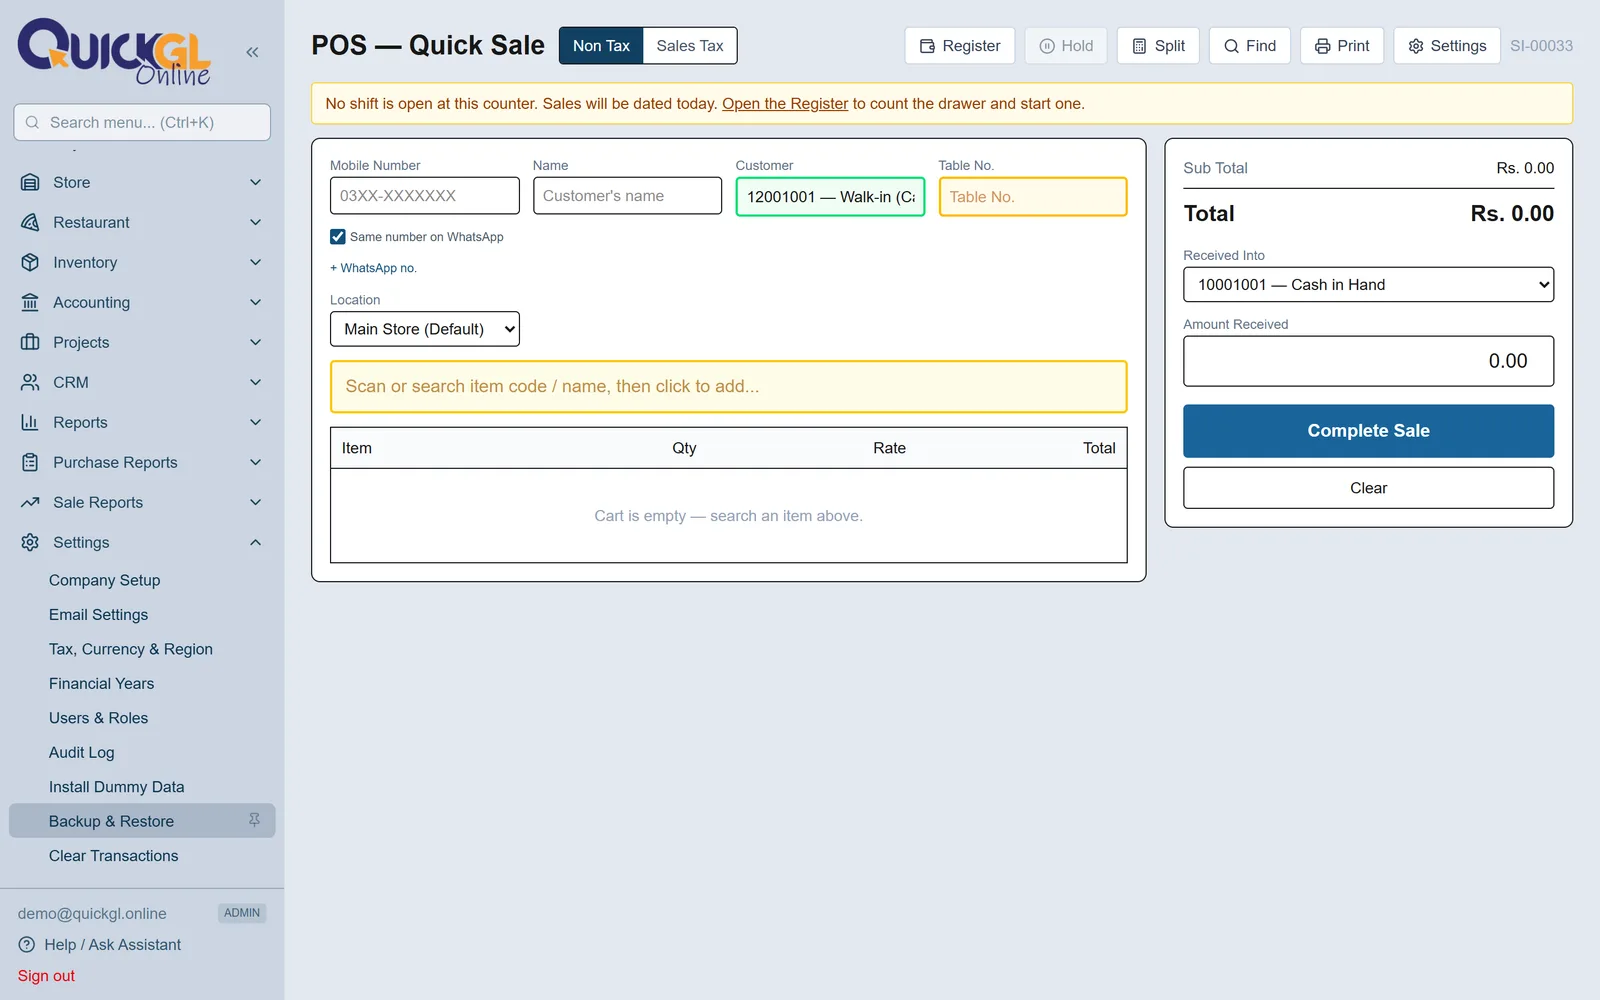
5Shift Report
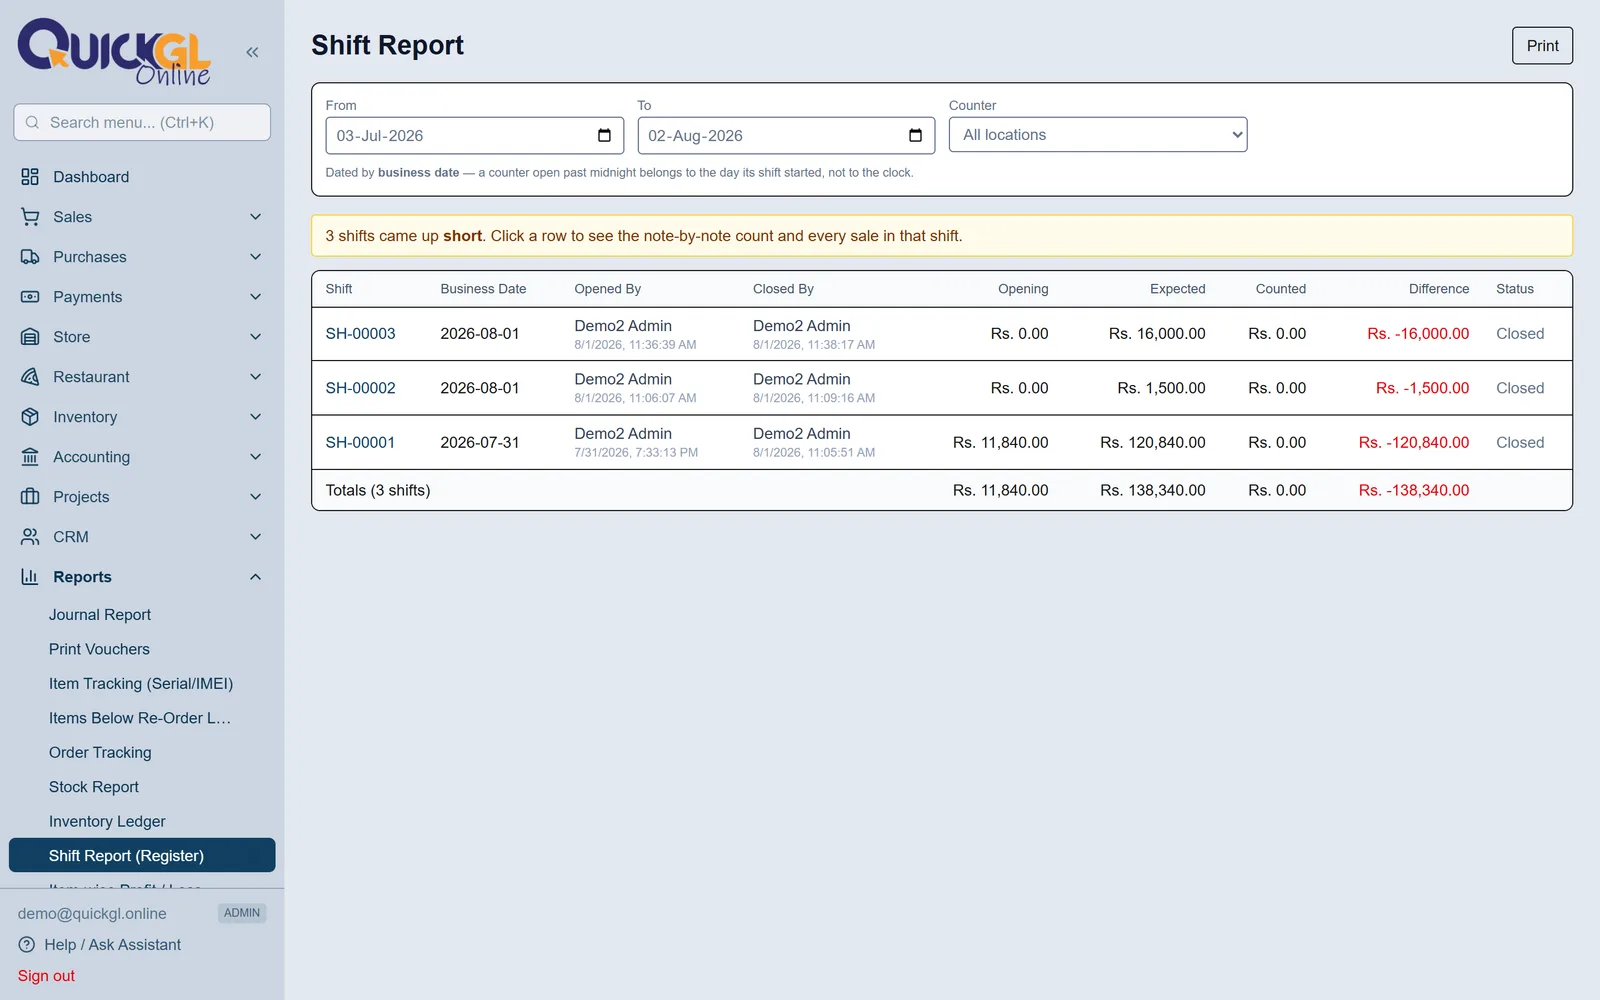
Reports → Shift Report. Every closed shift with who opened it, who closed it, what was expected and what was actually counted. The Difference column is the point: one short evening is a miscount, the same till short every week is something else. Click any row for the note-by-note count and every sale in that shift.
Reading the reports
Five reports answer most questions. Every row in them is clickable — click it and you land on the document the number came from.
1Profit & Loss — did I make money?
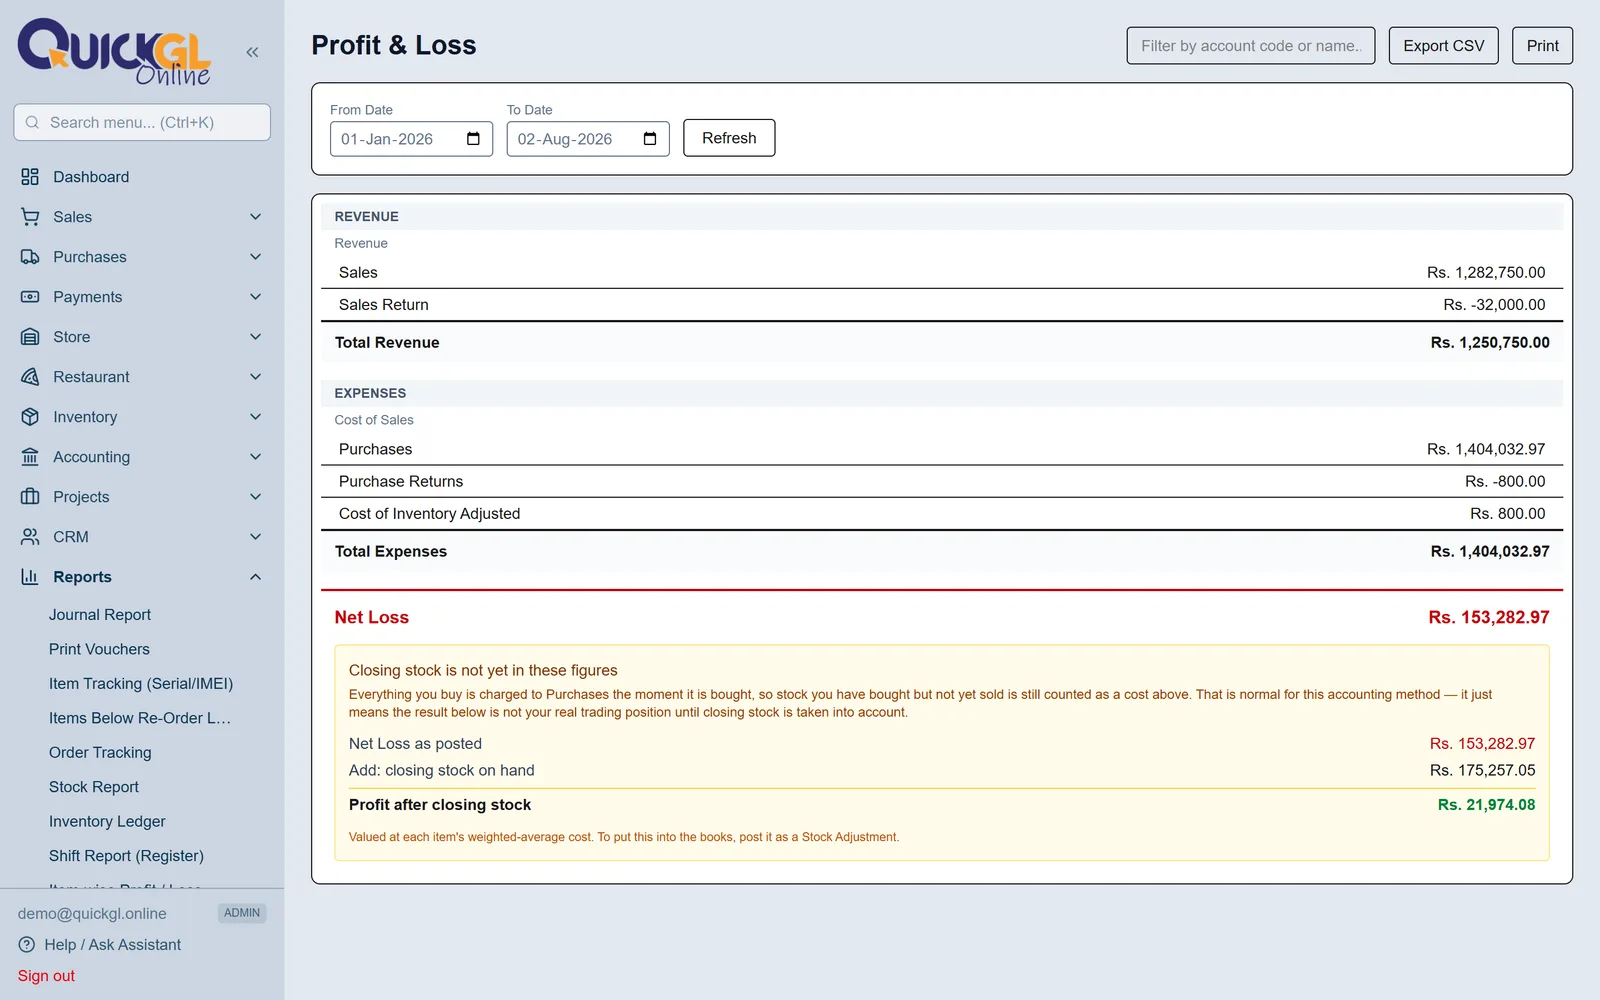
Income minus expenses for the dates you pick. If it shows a loss in a month you know was good, read the amber panel underneath: unsold stock sits inside Purchases until it is sold, so the panel shows your profit again after closing stock is counted.
2Who owes me?
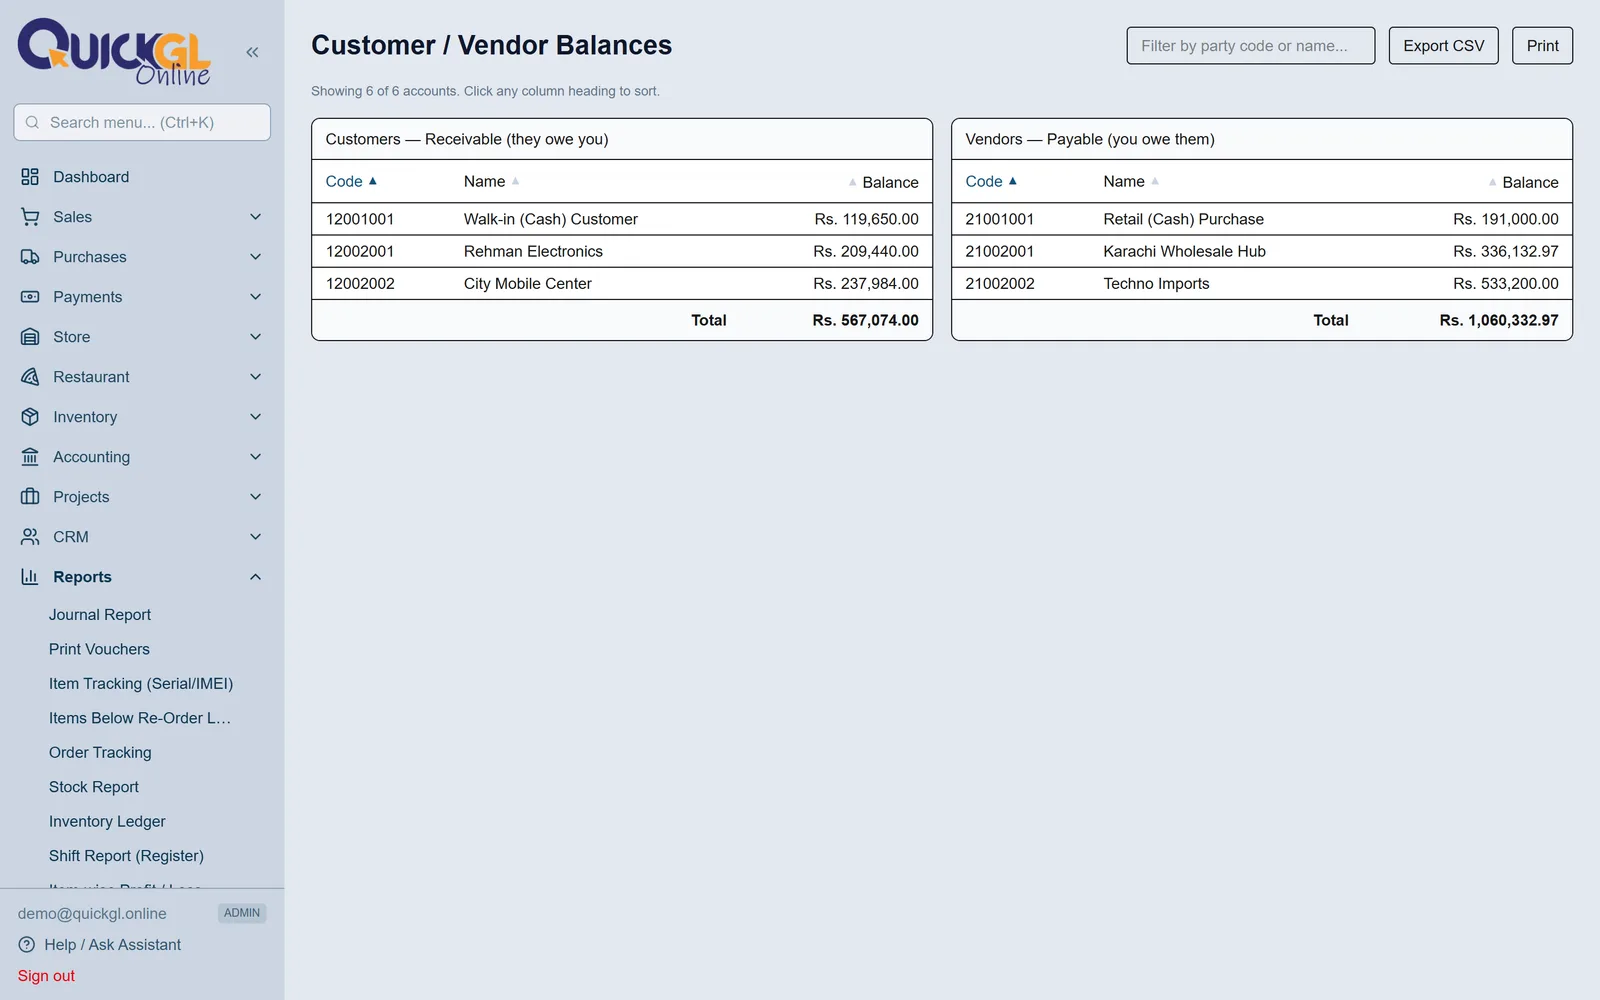
Reports → Customer / Vendor Balances for the plain answer, and Aging Report to see how old each amount is. Aging splits the same money into buckets — up to 30 days, 30 to 60, and older — which is what tells you who to chase first.
3What is in stock?
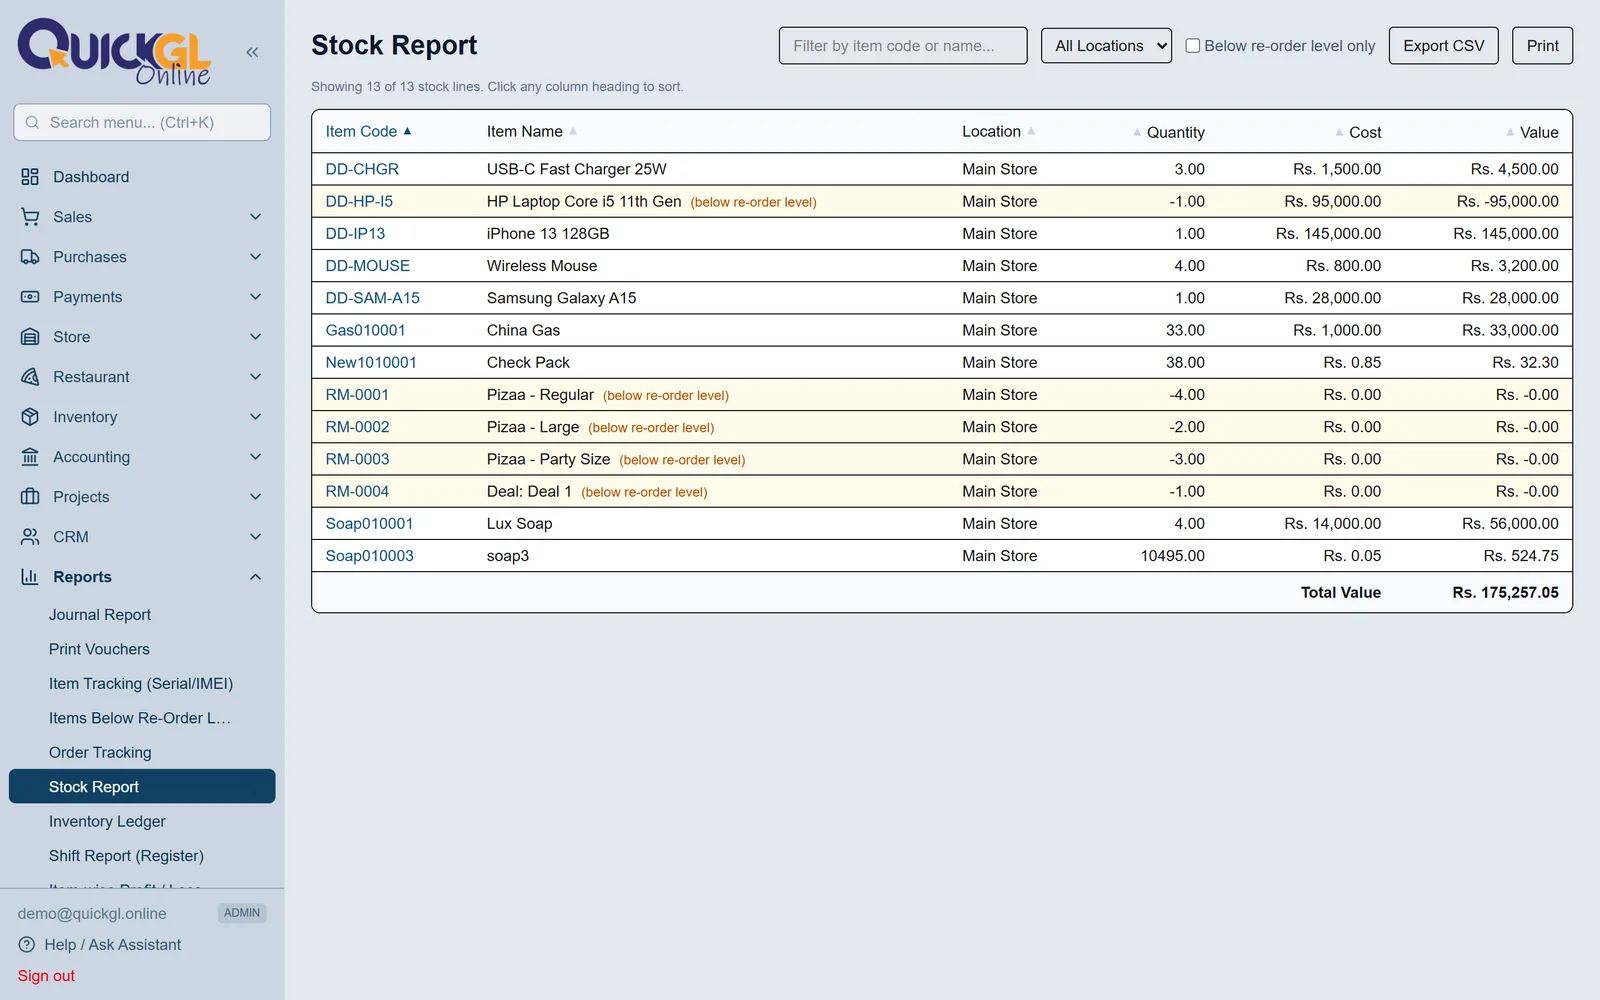
Reports → Stock Report shows the quantity and value of every item, per location. Inventory Ledger takes one item and shows every movement in and out with a running balance — the report to open when a quantity looks wrong and you need to know why.
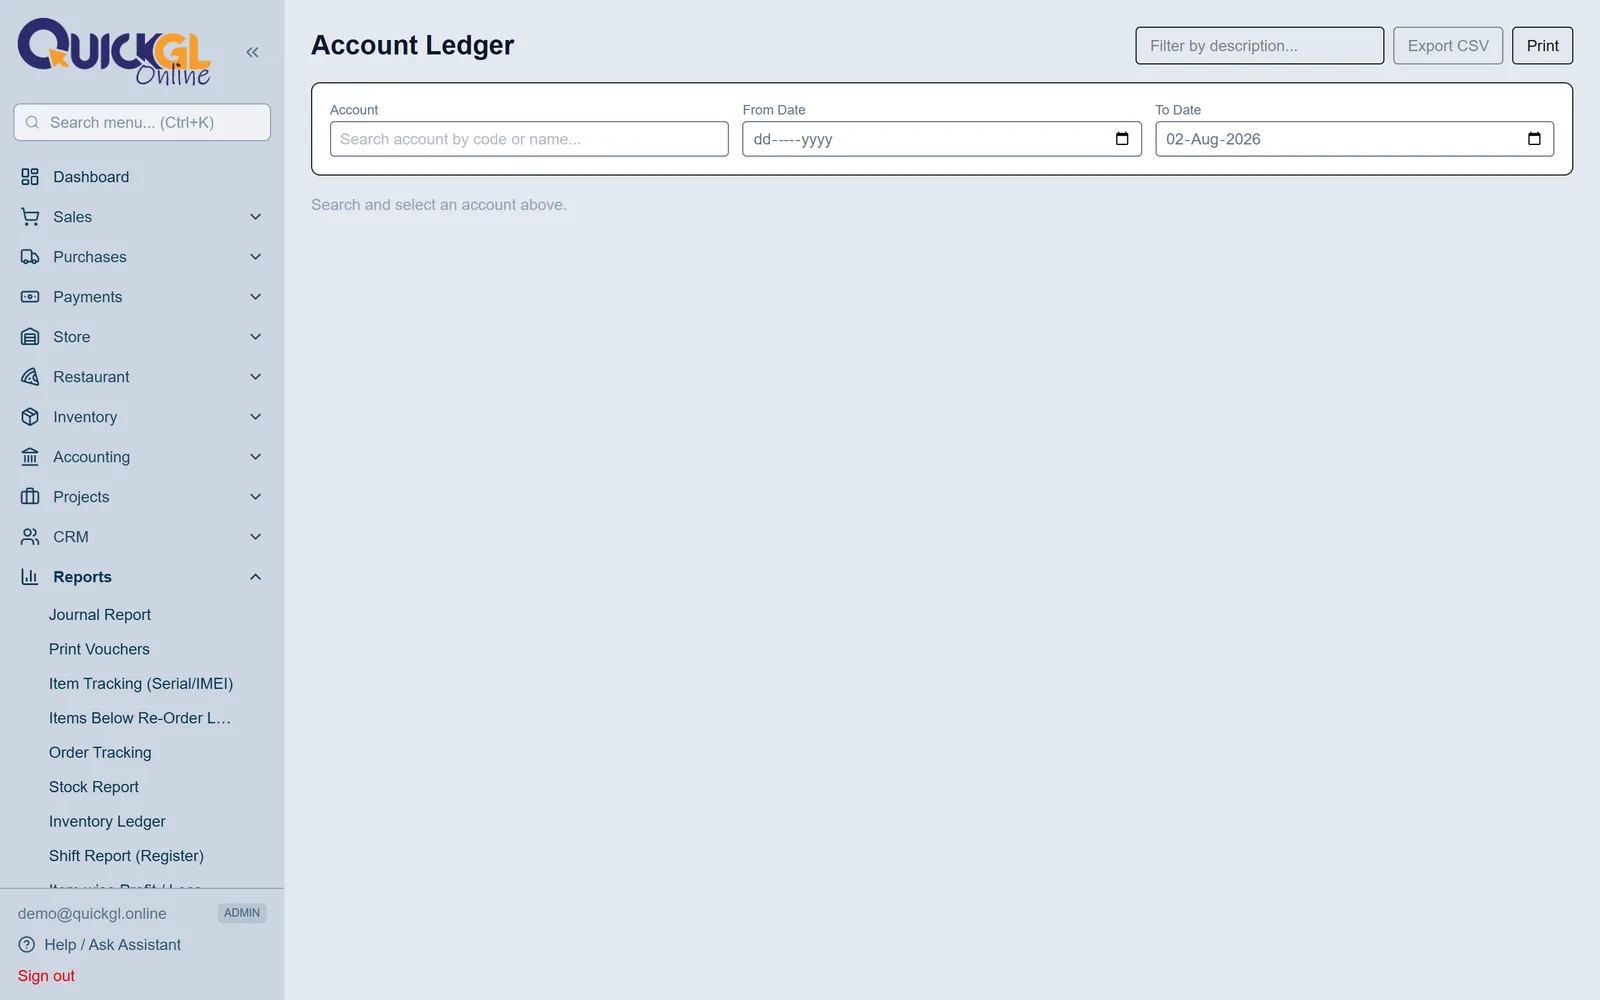
4One account's full history
Reports → Account Ledger. Pick any account — a customer, a bank, an expense — and see every entry with a running balance. Leaving From Date empty means "from the very beginning".
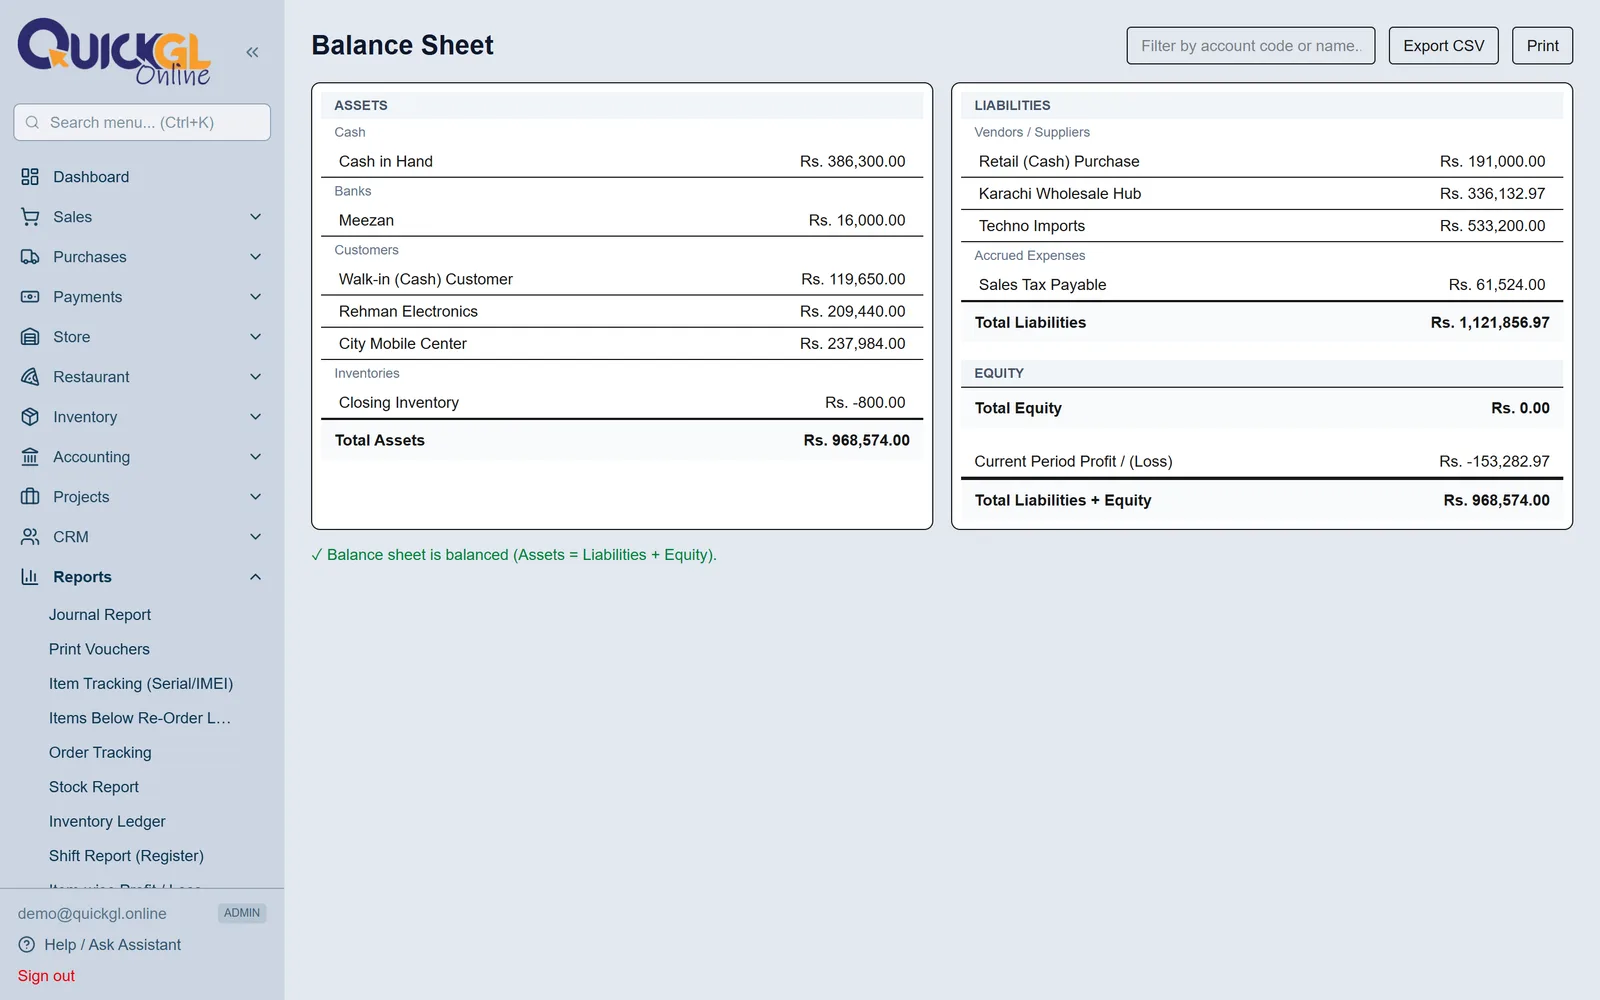
5Balance Sheet
What the business owns against what it owes, on a chosen date. The two sides must be equal; if they are not, the Trial Balance will show where the problem started.
Staff and permissions
Give each person their own login. Shared passwords make every audit trail useless — the software records who did what, but only if "who" is a real person.
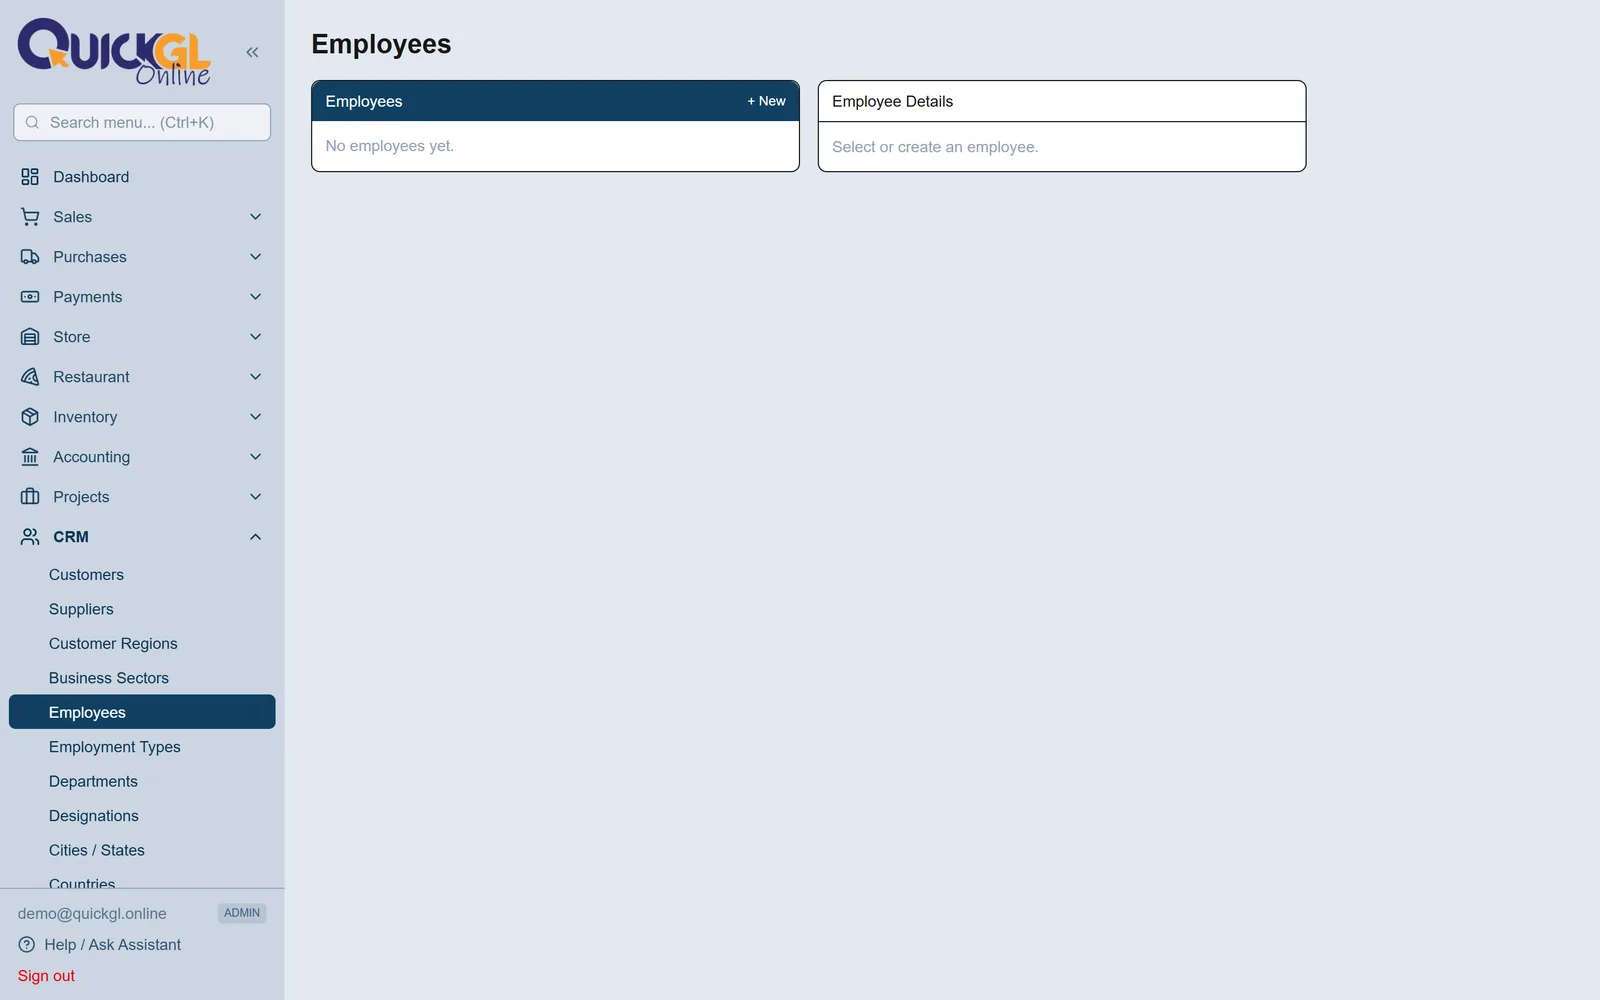
1Add the employee
Parties → Employees. Add the person, then tick Create Login and set their email, password and role. You can have the details emailed to them automatically.
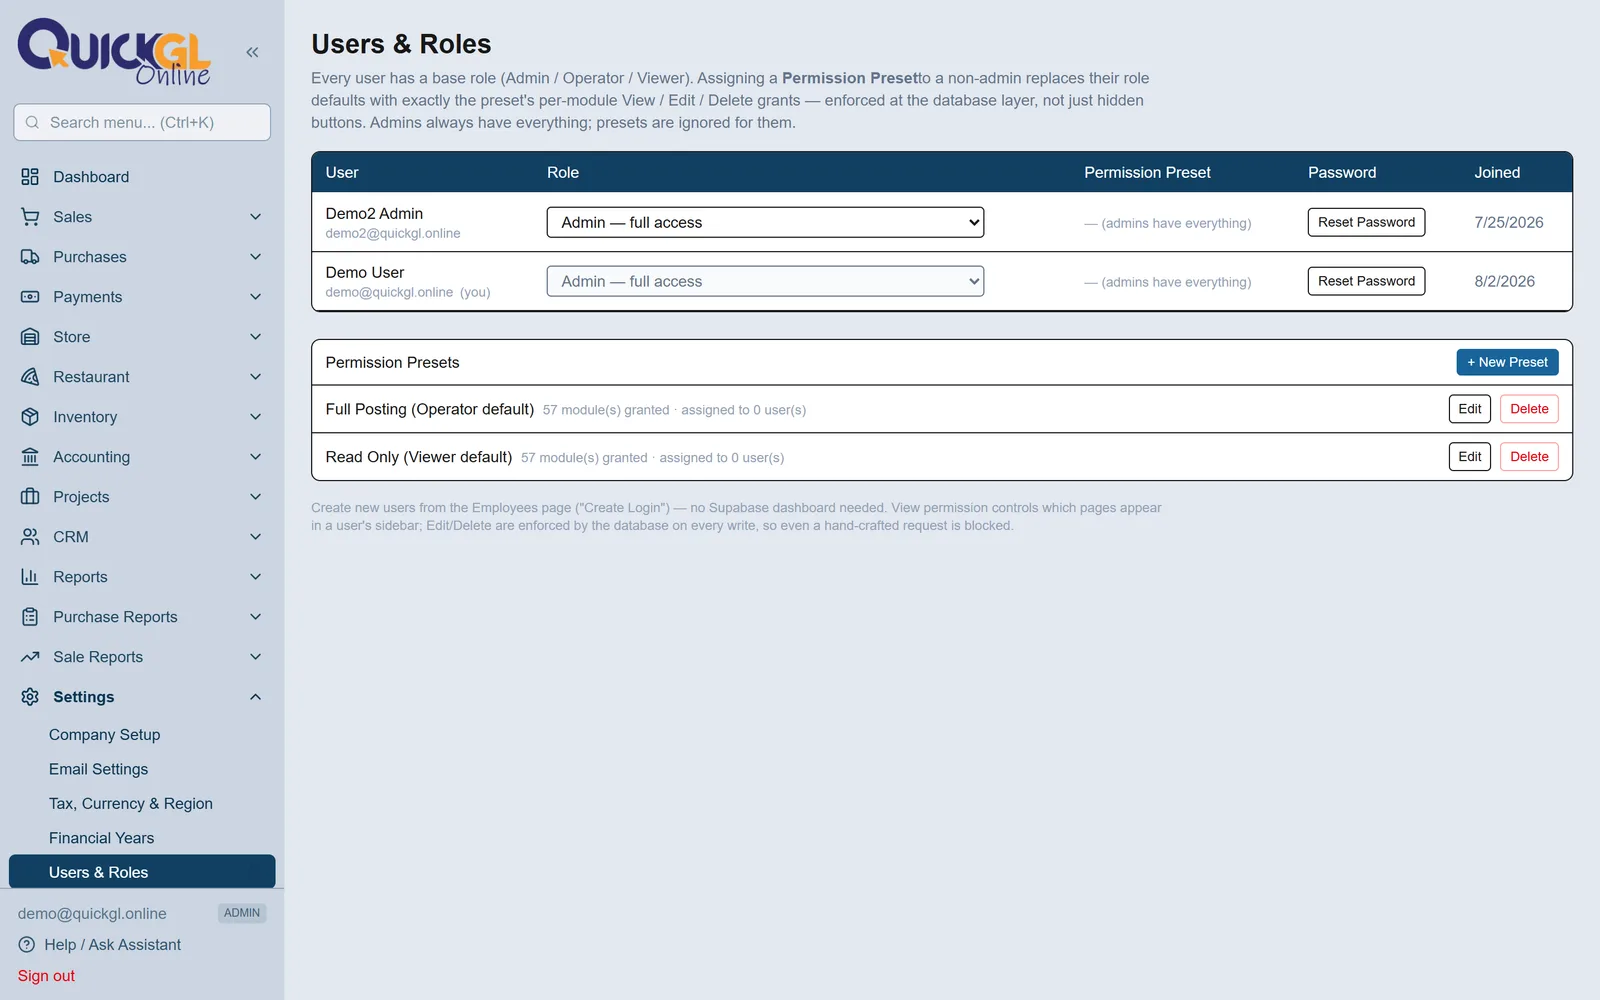
2Decide what they can touch
Settings → Users & Roles. Admin can do everything, Operator can post and cancel documents but not change master data, and Viewer can only look. For anything in between, build a permission preset: tick View, Edit or Delete per module. Editing a preset changes it for everyone using it straight away.
Common questions
›Can I correct an invoice after saving it?
Yes — open it and press Amend. A posted invoice is never edited in place, because that would rewrite history. Amend cancels the original (leaving it visible and cancelled) and gives you a fresh copy to correct and save under a new number. Duplicate does the same prefill without cancelling anything, for when you just want a similar invoice again.
›My shop is open past midnight. How do I keep one night as one day?
Turn on Register from POS Settings and open a shift when the counter opens. Every sale made while that shift is open takes the shift's date, so a counter trading from 6pm to 2am stays a single day in Sale Summary, the Dashboard, Profit & Loss and Aging — no separate report needed.
›The Profit & Loss shows a loss but I know the month was good. Why?
Because stock you bought but have not sold yet sits inside the Purchases expense until it sells. That is how periodic inventory works, and it is not a mistake. The amber panel under the report adds your closing stock back and shows the real trading position.
›Do I need to install anything?
No. It runs in any modern browser on a laptop, tablet or phone. You can also add it to your home screen so it opens like an app, but that is optional — nothing is stored on the device, so any computer with your login shows the same data.
›Can two people use it at the same time?
Yes, as many as you need, each with their own login and their own permissions. Document numbers are handed out by the database itself, so two people saving at the same moment can never receive the same invoice number.
›Is my data safe if I get something wrong?
Every change is recorded with who made it and when, and nobody can delete that record — not even an administrator. Cancelling a document does not erase it either; it stays visible as cancelled with a matching reversal entry, which is exactly what an auditor expects to see.
›Does it work outside Pakistan?
Yes. Set your country under Settings → Tax, Currency & Region and the tax names, rates and registration labels change to match — Pakistan, UAE and the UK are ready to pick, and the currency is set separately, so a Pakistani exporter can bill in dollars without changing their tax rules.
›Where do I get help inside the software?
There is an assistant on every screen — the button at the bottom of the sidebar, or the chat bubble in the corner. It knows which page you are on, so you can simply ask "what do I do here?" and get an answer about that screen.
 QuickGL Help Assistant